
IBM Verify Identity Access(IVIA) on Openshift
Overview
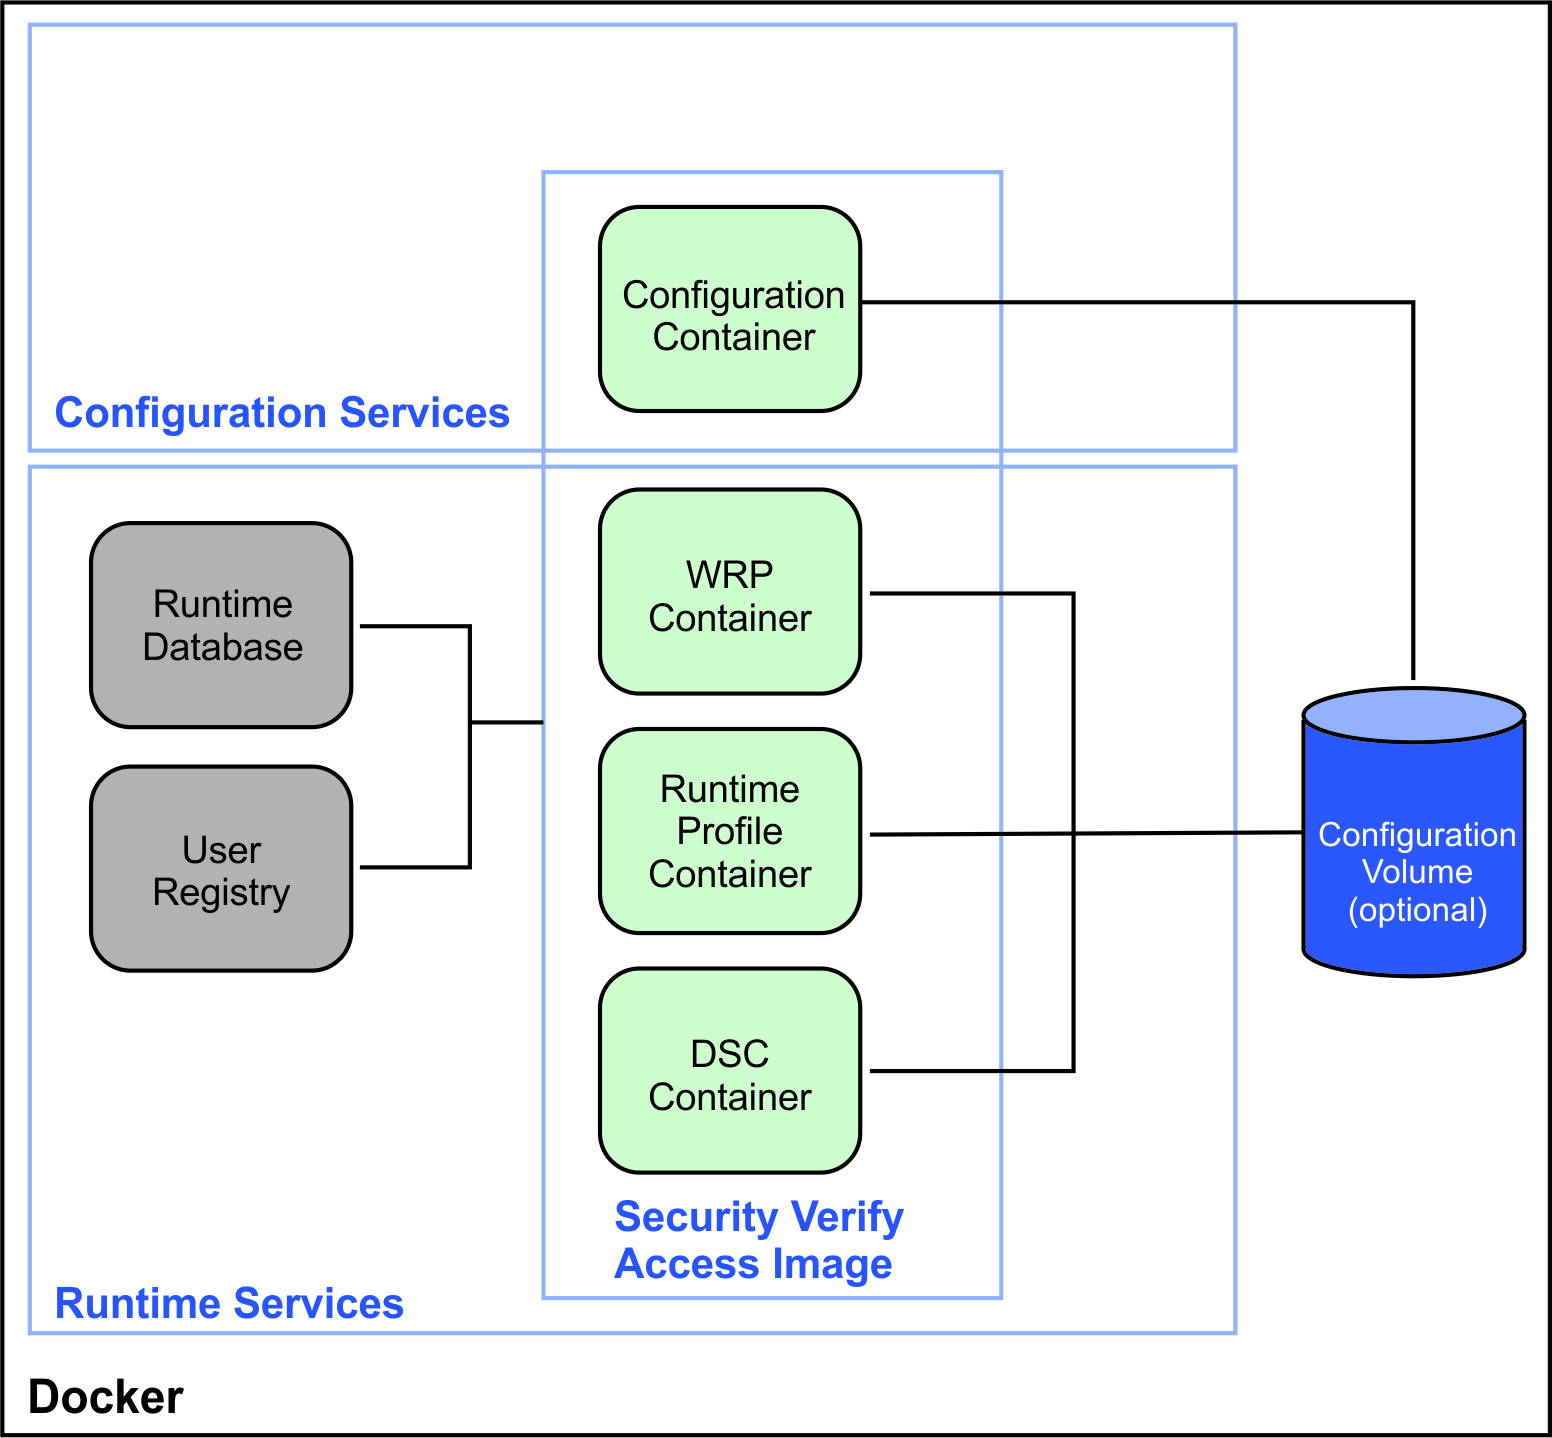
IBM Verify Identity Access를 Openshift위에 배포하는 과정을 살펴보겠습니다.
Kubernetes도 비슷하니 참고하시면 되겠습니다.
STEP
0. git clone
예시로 사용할 git을 다운로드 받습니다.
$ git clone https://github.com/IBM-Security/verify-access-container-deployment.git
1. 필요 Certificate 생성
LDAP, PostgreSQL, ISVAOP(이번 문서에서는 다루지 않음)의 Key파일들을 생성합니다.
$ ./common/create-ldap-and-postgres-isvaop-keys.sh

Creating LDAP certificate files
...
Creating LDAP dhparam.pem
Generating DH parameters, 2048 bit long safe prime
...
Creating postgres certificate files
...
Creating ISVAOP certificate files
아래와 같이 local/dockerkeys/아래에 생성되게 됩니다.
$ ls local/dockerkeys/
isvaop  openldap  postgresq
2. 프로젝트 생성
verify access를 위한 namespace를 새로 만들어주겠습니다.
$ oc new-project isvaop
3. Service Account 생성 및 SSC 부여
각 컴포넌트들에서 사용할 서비스어카운트와 적당한 SCC를 부여해줍니다.
$ ./openshift/setup-security.sh

Creating Service Account
serviceaccount/verifyaccess-config created
serviceaccount/verifyaccess-anyuid created
serviceaccount/verifyaccess-nonroot created
Creating verifyaccess Security Context Constraint
securitycontextconstraints.security.openshift.io/verifyaccess created
Adding service accounts to Security Constraints
clusterrole.rbac.authorization.k8s.io/system:openshift:scc:verifyaccess added: "verifyaccess-config"
clusterrole.rbac.authorization.k8s.io/system:openshift:scc:anyuid added: "verifyaccess-anyuid"
clusterrole.rbac.authorization.k8s.io/system:openshift:scc:nonroot added: "verifyaccess-nonroot"
4. Secret 생성
여기서부터
kubernetes폴더로 진행
위에서 만든 Key값들과 admin유저의 password를 secret으로 생성합니다.
$ ./kubernetes/create-secrets.sh

Deleting openldap-keys Secret
Creating OpenLDAP SSL Keys as a Secret
secret/openldap-keys created
Deleting postgresql-keys Secret
Creating server.pem as a Secret
secret/postgresql-keys created
Deleting iviaadmin Secret
Creating iviaadmin Secret
secret/iviaadmin created
secret/iviaadmin patched
Deleting configreader Secret
Creating configreader Secret
secret/configreader created
secret/configreader patched
Done.
5. Deploy
참고 : ivia-minikube.yaml
이제 verify access의 주요 컴포넌트들을 배포해보겠습니다.
샘플파일을 참고해서 환경에 맞게 파라미터를 조정하시면 됩니다.
5.1 persistent volume
PV를 생성할 storageClassName 을 지정해줍니다.
apiVersion: v1
kind: PersistentVolumeClaim
metadata:
  name: ldaplib
spec:
  accessModes:
    - ReadWriteOnce
  storageClassName: {STORAGE_CLASS_NAME}
  resources:
    requests:
      storage: 50M
---
apiVersion: v1
kind: PersistentVolumeClaim
metadata:
  name: ldapslapd
spec:
  accessModes:
    - ReadWriteOnce
  storageClassName: {STORAGE_CLASS_NAME}
  resources:
    requests:
      storage: 50M
---
apiVersion: v1
kind: PersistentVolumeClaim
metadata:
  name: ldapsecauthority
spec:
  accessModes:
    - ReadWriteOnce
  storageClassName: {STORAGE_CLASS_NAME}
  resources:
    requests:
      storage: 50M
---
apiVersion: v1
kind: PersistentVolumeClaim
metadata:
  name: postgresqldata
spec:
  accessModes:
    - ReadWriteOnce
  storageClassName: {STORAGE_CLASS_NAME}
  resources:
    requests:
      storage: 50M
---
apiVersion: v1
kind: PersistentVolumeClaim
metadata:
  name: iviaconfig
spec:
  accessModes:
    - ReadWriteOnce
  storageClassName: {STORAGE_CLASS_NAME}
  resources:
    requests:
      storage: 50M
5.2 openldap
apiVersion: apps/v1
kind: Deployment
metadata:
  name: openldap
  labels:
    app: openldap
spec:
  selector:
    matchLabels:
      app: openldap
  replicas: 1
  template:
    metadata:
      labels:
        app: openldap
    spec:
      serviceAccountName: verifyaccess-anyuid
      volumes:
        - name: ldaplib
          persistentVolumeClaim:
            claimName: ldaplib
        - name: ldapslapd
          persistentVolumeClaim:
            claimName: ldapslapd
        - name: ldapsecauthority
          persistentVolumeClaim:
            claimName: ldapsecauthority
        - name: openldap-keys
          secret:
            secretName: openldap-keys
      containers:
        - name: openldap
          image: icr.io/isva/verify-access-openldap:10.0.6.0
          livenessProbe:
            tcpSocket:
              port: 636
            initialDelaySeconds: 15
            periodSeconds: 20
          readinessProbe:
            tcpSocket:
              port: 636
            initialDelaySeconds: 5
            periodSeconds: 10
          ports:
            - containerPort: 636
          env:
            - name: LDAP_DOMAIN
              value: ibm.com
            - name: LDAP_ADMIN_PASSWORD
              value: Passw0rd
            - name: LDAP_CONFIG_PASSWORD
              value: Passw0rd
          volumeMounts:
            - mountPath: /var/lib/ldap
              name: ldaplib
            - mountPath: /etc/ldap/slapd.d
              name: ldapslapd
            - mountPath: /var/lib/ldap.secAuthority
              name: ldapsecauthority
            - mountPath: /container/service/slapd/assets/certs
              name: openldap-keys
          args: [ "--copy-service"]
---
apiVersion: v1
kind: Service
metadata:
  name: openldap
  labels:
    app: openldap
spec:
  ports:
    - port: 636
      name: ldaps
      protocol: TCP
  selector:
    app: openldap
5.3 PostgreSQL
apiVersion: apps/v1
kind: Deployment
metadata:
  name: postgresql
  labels:
    app: postgresql
spec:
  selector:
    matchLabels:
      app: postgresql
  replicas: 1
  template:
    metadata:
      labels:
        app: postgresql
    spec:
      serviceAccountName: verifyaccess-nonroot
      volumes:
        - name: postgresqldata
          persistentVolumeClaim:
            claimName: postgresqldata
        - name: postgresql-keys
          secret:
            secretName: postgresql-keys
      containers:
        - name: postgresql
          image: icr.io/ivia/ivia-postgresql:11.0.1.0
          livenessProbe:
            tcpSocket:
              port: 5432
            initialDelaySeconds: 15
            periodSeconds: 20
          readinessProbe:
            tcpSocket:
              port: 5432
            initialDelaySeconds: 5
            periodSeconds: 10
          ports:
            - containerPort: 5432
          env:
            - name: POSTGRES_USER
              value: postgres
            - name: POSTGRES_PASSWORD
              value: Passw0rd
            - name: POSTGRES_DB
              value: ivia
            - name: POSTGRES_SSL_KEYDB
              value: /var/local/server.pem
            - name: PGDATA
              value: /var/lib/postgresql/data/db-files/
          volumeMounts:
            - mountPath: /var/lib/postgresql/data
              name: postgresqldata
            - mountPath: /var/local
              name: postgresql-keys
---
apiVersion: v1
kind: Service
metadata:
  name: postgresql
spec:
  ports:
    - port: 5432
      name: postgresql
      protocol: TCP
  selector:
    app: postgresql
5.4 IVIA config
250713)위의 SCC로는 file mount에 대한 권한이 부족하여 snapshot폴더를 비롯한 config관련 파일들을 생성하지 못함.
임시방편으로 아래와 같이privileged권한과Deployment의securityContext를 수정하여 root권한으로 pod를 돌릴 수 있게 바꿈. -> 나중에 적절한 권한을 세팅할 수 있게되면 업데이트예정.$ oc adm policy add-scc-to-user privileged -z verifyaccess-config clusterrole.rbac.authorization.k8s.io/system:openshift:scc:privileged added: "verifyaccess-config"
apiVersion: apps/v1
kind: Deployment
metadata:
  name: iviaconfig
  labels:
    app: iviaconfig
spec:
  selector:
    matchLabels:
      app: iviaconfig
  replicas: 1
  template:
    metadata:
      labels:
        app: iviaconfig
    spec:
      serviceAccountName: verifyaccess-config
      securityContext:
        runAsUser: 0
        runAsNonRoot: false
      volumes:
        - name: iviaconfig
          persistentVolumeClaim:
            claimName: iviaconfig
        - name: iviaconfig-logs
          emptyDir: {}
      containers:
        - name: iviaconfig
          image: icr.io/ivia/ivia-config:11.0.1.0
          volumeMounts:
            - mountPath: /var/shared
              name: iviaconfig
            - mountPath: /var/application.logs
              name: iviaconfig-logs
          env:
            - name: CONTAINER_TIMEZONE
              value: Asia/Seoul
            - name: ADMIN_PWD
              valueFrom:
                secretKeyRef:
                  name: iviaadmin
                  key: adminpw
          livenessProbe:
            exec:
              command:
              - /sbin/health_check.sh
              - livenessProbe
            periodSeconds: 10
            timeoutSeconds: 2
            failureThreshold: 6
          readinessProbe:
            httpGet:
              scheme: HTTPS
              port: 9443
              path: /core/login
            periodSeconds: 10
            timeoutSeconds: 2
            failureThreshold: 2
          startupProbe:
            exec:
              command:
              - /sbin/health_check.sh
            failureThreshold: 30
            periodSeconds: 10
            timeoutSeconds: 2
      imagePullSecrets:
        - name: dockerlogin
---
apiVersion: v1
kind: Service
metadata:
  name: iviaconfig
spec:
  ports:
    - port: 9443
      name: iviaconfig
      protocol: TCP
  selector:
    app: iviaconfig
5.5 web reverse proxy
apiVersion: apps/v1
kind: Deployment
metadata:
  name: iviawrprp1
  labels:
    app: iviawrprp1
spec:
  selector:
    matchLabels:
      app: iviawrprp1
  replicas: 1
  template:
    metadata:
      labels:
        app: iviawrprp1
    spec:
      volumes:
        - name: iviaconfig
          emptyDir: {}
        - name: iviawrprp1-logs
          emptyDir: {}
      containers:
        - name: iviawrprp1
          image: icr.io/ivia/ivia-wrp:11.0.1.0
          ports:
            - containerPort: 9443
          volumeMounts:
            - mountPath: /var/shared
              name: iviaconfig
            - mountPath: /var/application.logs
              name: iviawrprp1-logs
          env:
            - name: INSTANCE
              value: rp1
            - name: CONTAINER_TIMEZONE
              value: Asia/Seoul
            - name: CONFIG_SERVICE_URL
              value: https://iviaconfig:9443/shared_volume
            - name: CONFIG_SERVICE_USER_NAME
              value: cfgsvc
            - name: CONFIG_SERVICE_USER_PWD
              valueFrom:
                secretKeyRef:
                  name: configreader
                  key: cfgsvcpw
            - name: CONFIG_SERVICE_TLS_CACERT
              value: disabled
          livenessProbe:
            exec:
              command:
              - /sbin/health_check.sh
              - livenessProbe
            periodSeconds: 10
            failureThreshold: 6000
            timeoutSeconds: 2
          readinessProbe:
            exec:
              command:
              - /sbin/health_check.sh
            periodSeconds: 10
            timeoutSeconds: 2
            failureThreshold: 2000
      imagePullSecrets:
        - name: dockerlogin
---
apiVersion: v1
kind: Service
metadata:
  name: iviawrprp1
spec:
  ports:
    - port: 9443
      name: iviawrprp1
      protocol: TCP
  selector:
    app: iviawrprp1
5.6 runtime
apiVersion: apps/v1
kind: Deployment
metadata:
  name: iviaruntime
  labels:
    app: iviaruntime
spec:
  selector:
    matchLabels:
      app: iviaruntime
  replicas: 1
  template:
    metadata:
      labels:
        app: iviaruntime
    spec:
      volumes:
        - name: iviaconfig
          emptyDir: {}
        - name: iviaruntime-logs
          emptyDir: {}
      containers:
        - name: iviaruntime
          image: icr.io/ivia/ivia-runtime:11.0.1.0
          ports:
            - containerPort: 9443
          volumeMounts:
            - mountPath: /var/shared
              name: iviaconfig
            - mountPath: /var/application.logs
              name: iviaruntime-logs
          env:
            - name: CONTAINER_TIMEZONE
              value: Europe/London
            - name: CONFIG_SERVICE_URL
              value: https://iviaconfig:9443/shared_volume
            - name: CONFIG_SERVICE_USER_NAME
              value: cfgsvc
            - name: CONFIG_SERVICE_USER_PWD
              valueFrom:
                secretKeyRef:
                  name: configreader
                  key: cfgsvcpw
            - name: CONFIG_SERVICE_TLS_CACERT
              value: disabled
          livenessProbe:
            exec:
              command:
              - /sbin/health_check.sh
              - livenessProbe
            periodSeconds: 10
            timeoutSeconds: 2
            failureThreshold: 6
          readinessProbe:
            httpGet:
              scheme: HTTPS
              port: 9443
              path: /sps/static/ibm-logo.png
            periodSeconds: 10
            failureThreshold: 2
            timeoutSeconds: 2
          startupProbe:
            exec:
              command:
              - /sbin/health_check.sh
            failureThreshold: 30
            periodSeconds: 10
            timeoutSeconds: 2
      imagePullSecrets:
        - name: dockerlogin
---
apiVersion: v1
kind: Service
metadata:
  name: iviaruntime
spec:
  ports:
    - port: 9443
      name: iviaruntime
      protocol: TCP
  selector:
    app: iviaruntime
5.7 distributed cache
apiVersion: apps/v1
kind: Deployment
metadata:
  name: iviadsc
  labels:
    app: iviadsc
spec:
  selector:
    matchLabels:
      app: iviadsc
  replicas: 1
  template:
    metadata:
      labels:
        app: iviadsc
    spec:
      volumes:
        - name: iviaconfig
          emptyDir: {}
        - name: iviadsc-logs
          emptyDir: {}
      containers:
        - name: iviadsc
          image: icr.io/ivia/ivia-dsc:11.0.1.0
          ports:
            - containerPort: 9443
            - containerPort: 9444
          volumeMounts:
            - mountPath: /var/shared
              name: iviaconfig
            - mountPath: /var/application.logs
              name: iviadsc-logs
          env:
            - name: INSTANCE
              value: '1'
            - name: CONTAINER_TIMEZONE
              value: Asia/Seoul
            - name: CONFIG_SERVICE_URL
              value: https://iviaconfig:9443/shared_volume
            - name: CONFIG_SERVICE_USER_NAME
              value: cfgsvc
            - name: CONFIG_SERVICE_USER_PWD
              valueFrom:
                secretKeyRef:
                  name: configreader
                  key: cfgsvcpw
            - name: CONFIG_SERVICE_TLS_CACERT
              value: disabled
          livenessProbe:
            exec:
              command:
              - /sbin/health_check.sh
              - livenessProbe
            periodSeconds: 10
            timeoutSeconds: 2
            failureThreshold: 6
          readinessProbe:
            exec:
              command:
              - /sbin/health_check.sh
            periodSeconds: 10
            timeoutSeconds: 2
            failureThreshold: 2
      imagePullSecrets:
        - name: dockerlogin
---
apiVersion: v1
kind: Service
metadata:
  name: iviadsc
spec:
  ports:
    - port: 9443
      name: iviadsc-svc
      protocol: TCP
    - port: 9444
      name: iviadsc-rep
      protocol: TCP
  selector:
    app: iviadsc
5.8 deploy
배포하고 나면 아래와 같이 Distributed Cache, runtime, web reverse proxy는 에러가 발생하는 것을 확인할 수 있습니다.
아직 Configuration snapshot을 배포하기 전이므로 에러가 나는 것이 정상이니 넘어가시면 됩니다.
$ oc get pod

NAME                           READY   STATUS             RESTARTS          AGE
iviaconfig-6fc47f88fb-npzsd    1/1     Running            0                 16h
iviadsc-74df5b94cb-k74mz       0/1     CrashLoopBackOff            256 (6m10s ago)   16h
iviaop-dc5c69d89-rt55z         1/1     Running            1 (27h ago)       27h
iviaruntime-857dcc5b79-llsj8   0/1     CrashLoopBackOff            185 (95s ago)     16h
iviawrprp1-7ff8644798-b6fq9    0/1     CrashLoopBackOff   257 (2s ago)      16h
openldap-787957c77c-hxqbk      1/1     Running            0                 27h
postgresql-6764746786-hrwrf    1/1     Running            0                 27h
5.9 Route
이제 외부에서 IVIA를 접근할 수 있도록 Route를 생성해주어야 합니다.
passthrough로 생성해주면 됩니다.
그리고 url은 Openshift에서 자동으로 생성되는 url로 사용해도 무방합니다.
외부로 열어야하는 서비스 : config, web reverse proxy
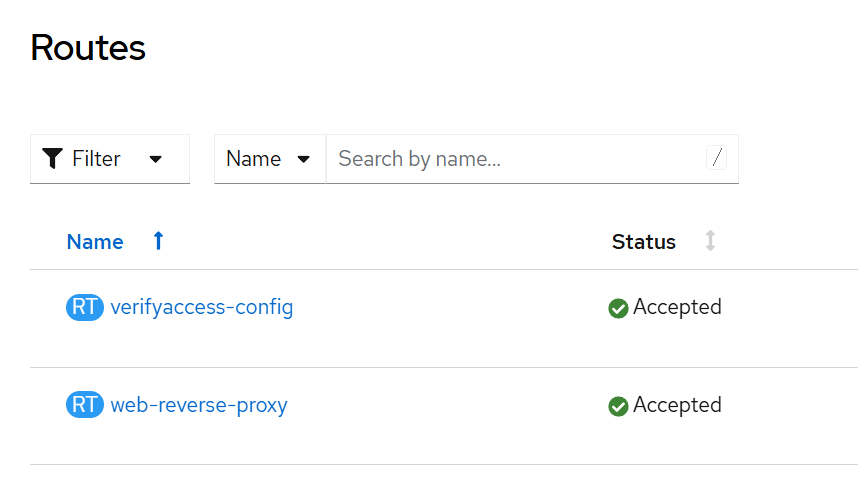
route생성 후 config쪽 url로 이동하면 정상적으로 콘솔 화면이 뜨는 것을 확인할 수 있습니다.
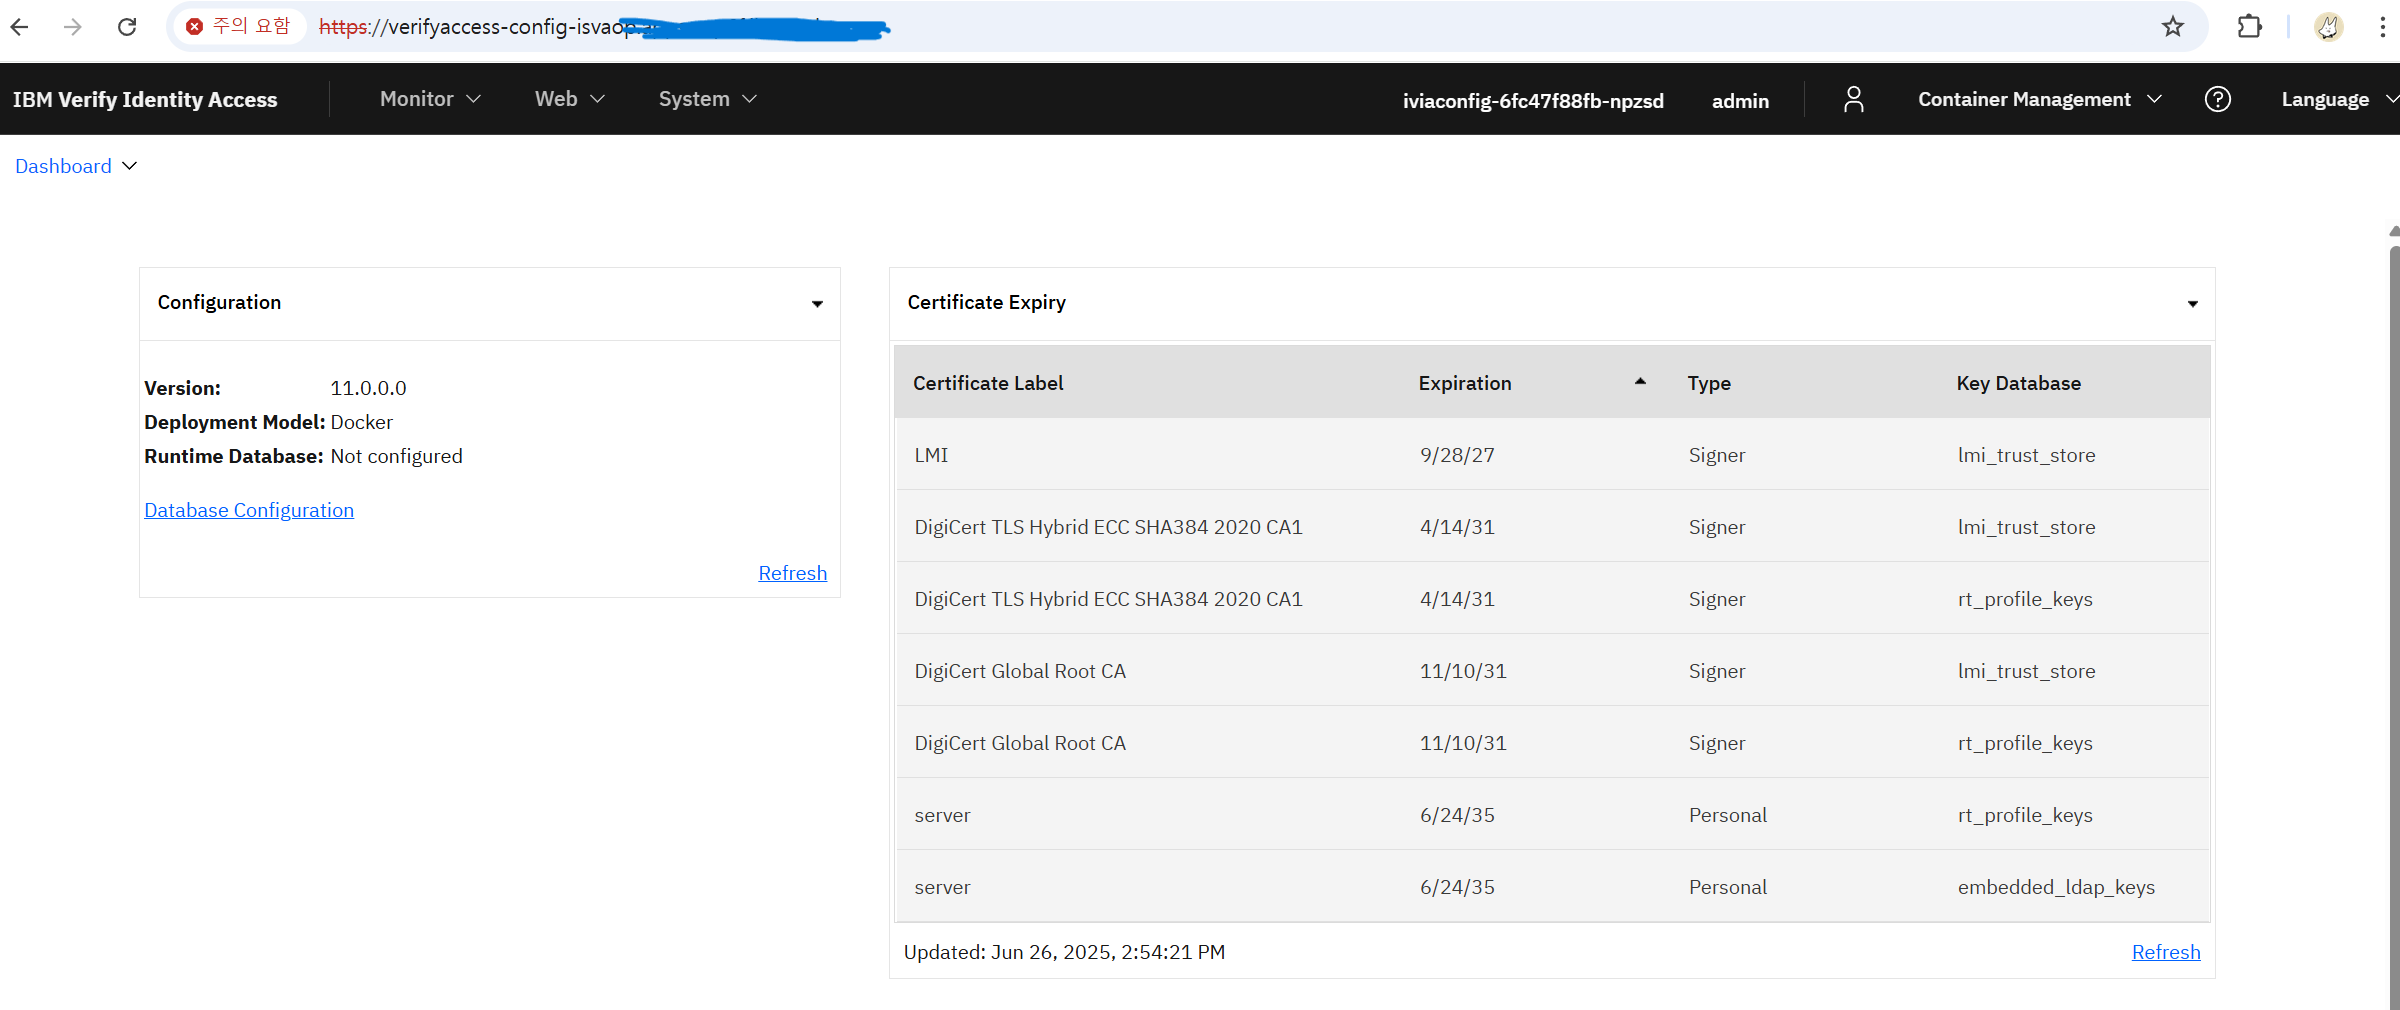
6. Setting
그럼 이제 IVIA를 사용할 수 있도록 초기 세팅을 진행해보겠습니다.
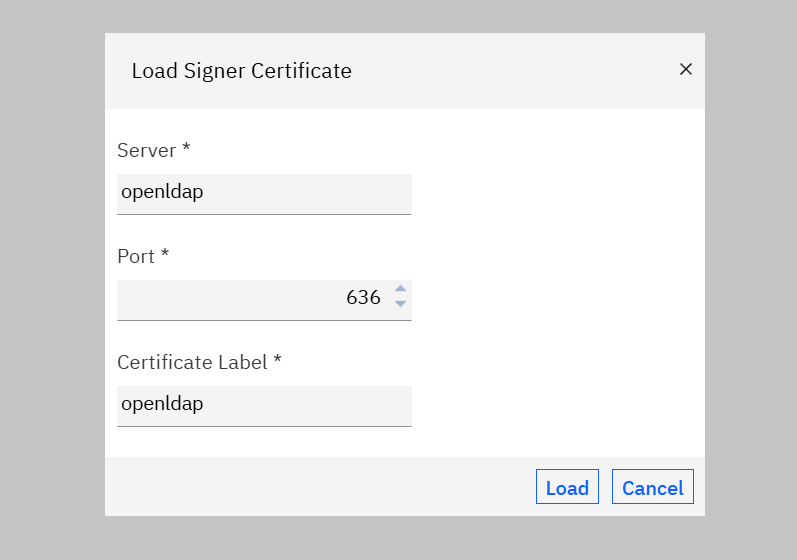
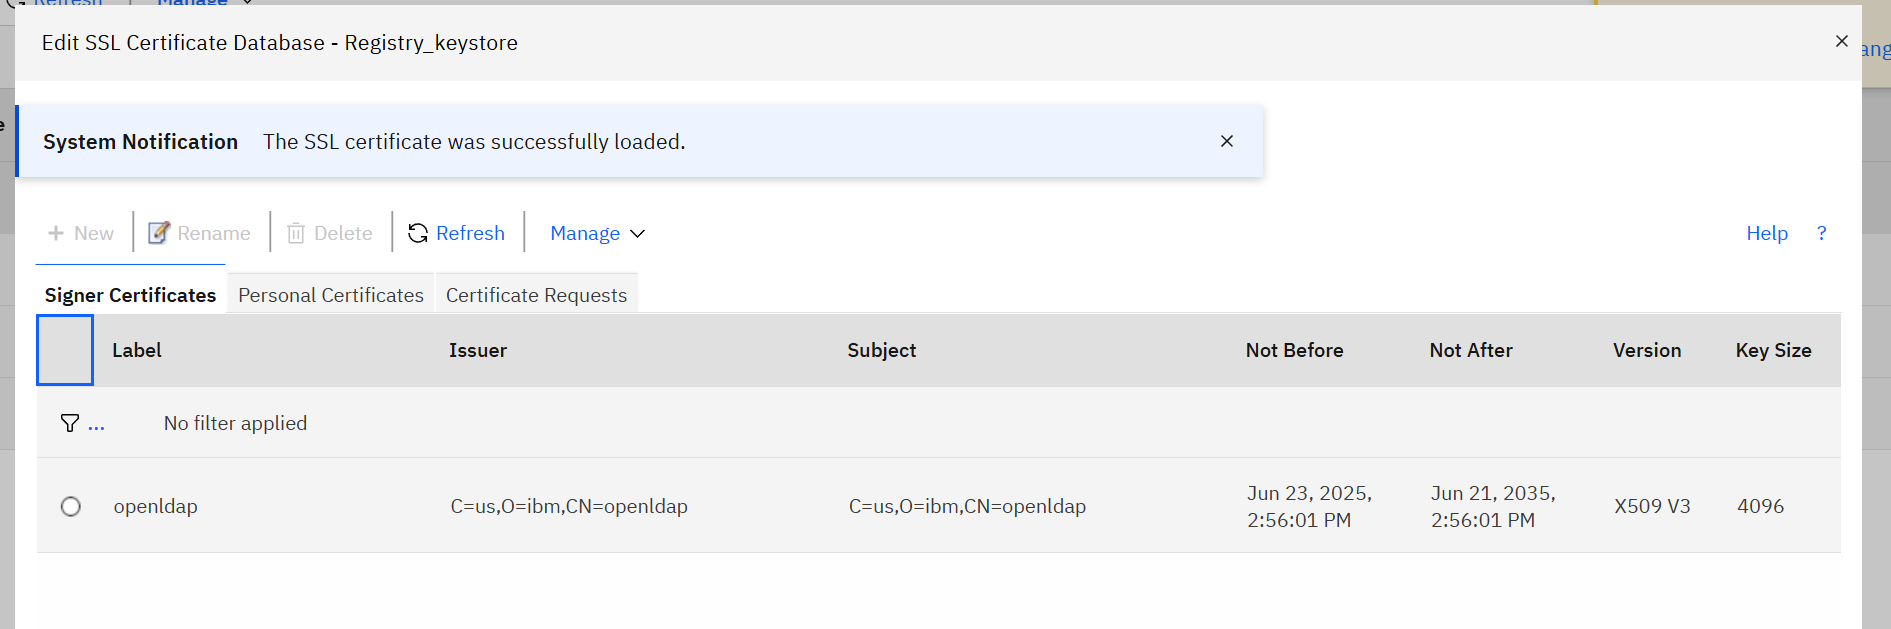
6.1 OpenLDAP certificate
먼저 생성한 OpenLDAP의 인증서를 등록해주겠습니다.
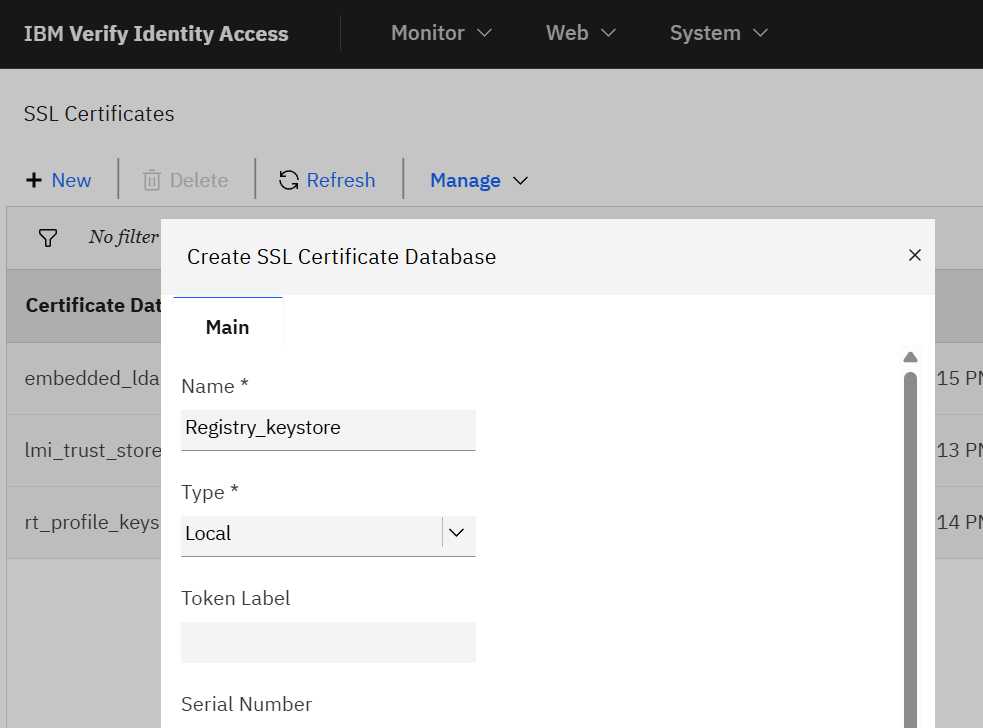
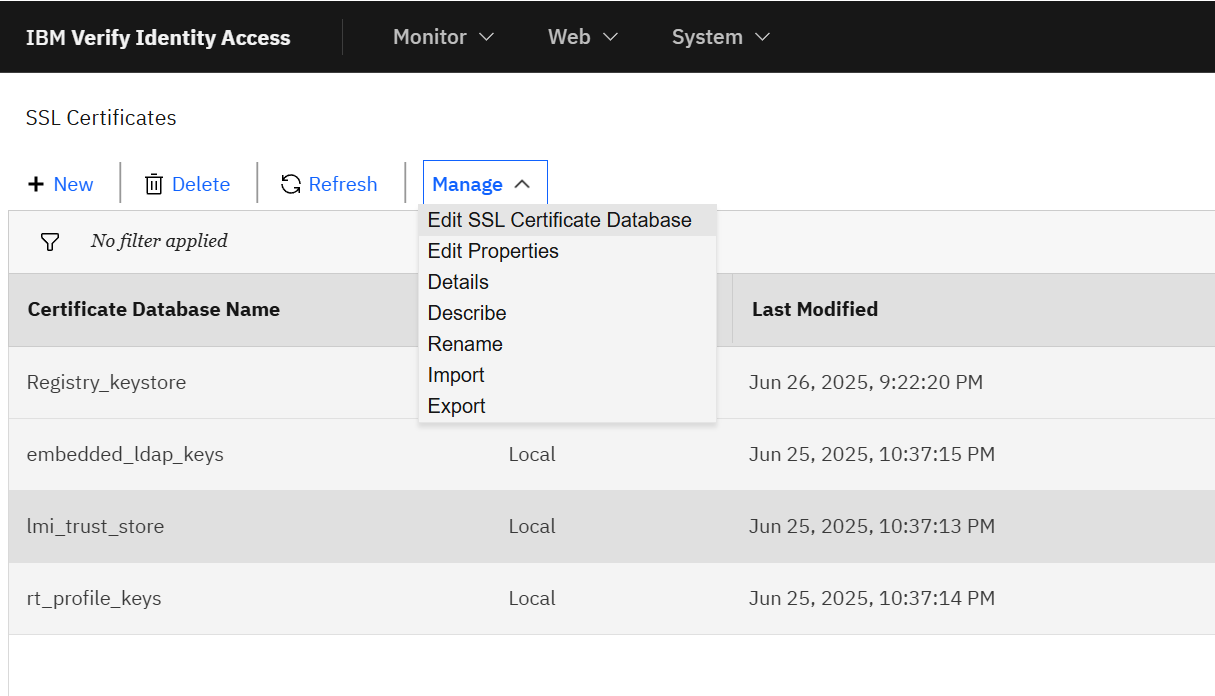
System > Secure Settings > SSL Certificates
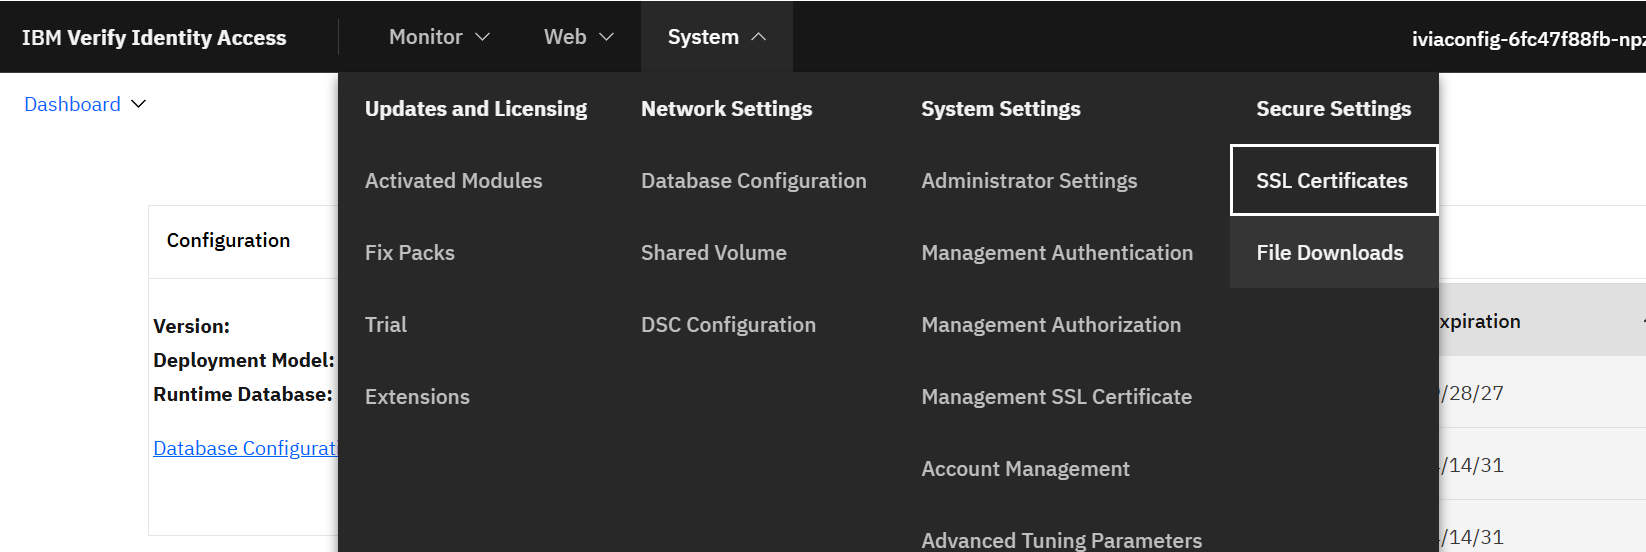
Create SSL Certificate Database
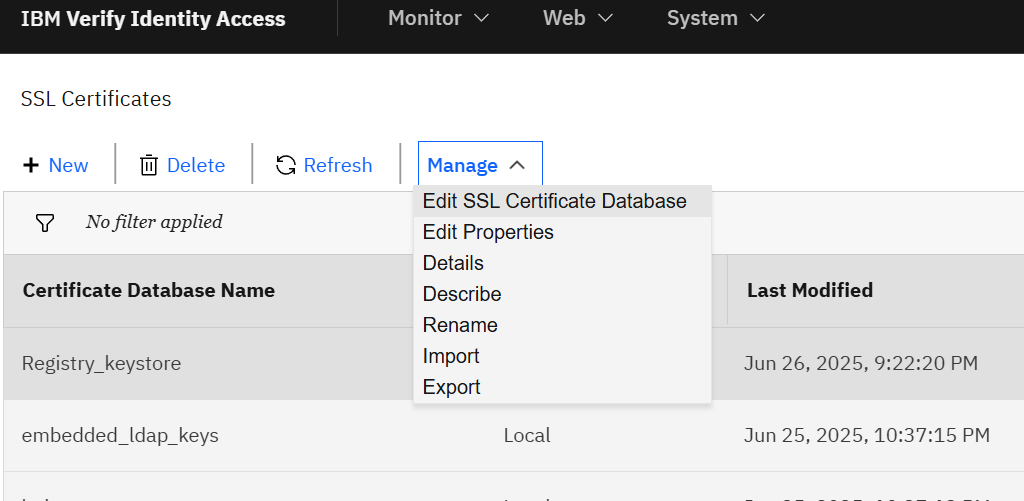
만들었던 keystore를 선택하고 Edit
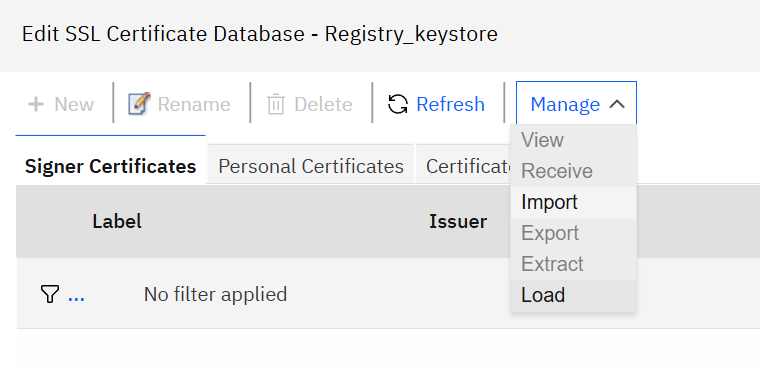
Certificate Load
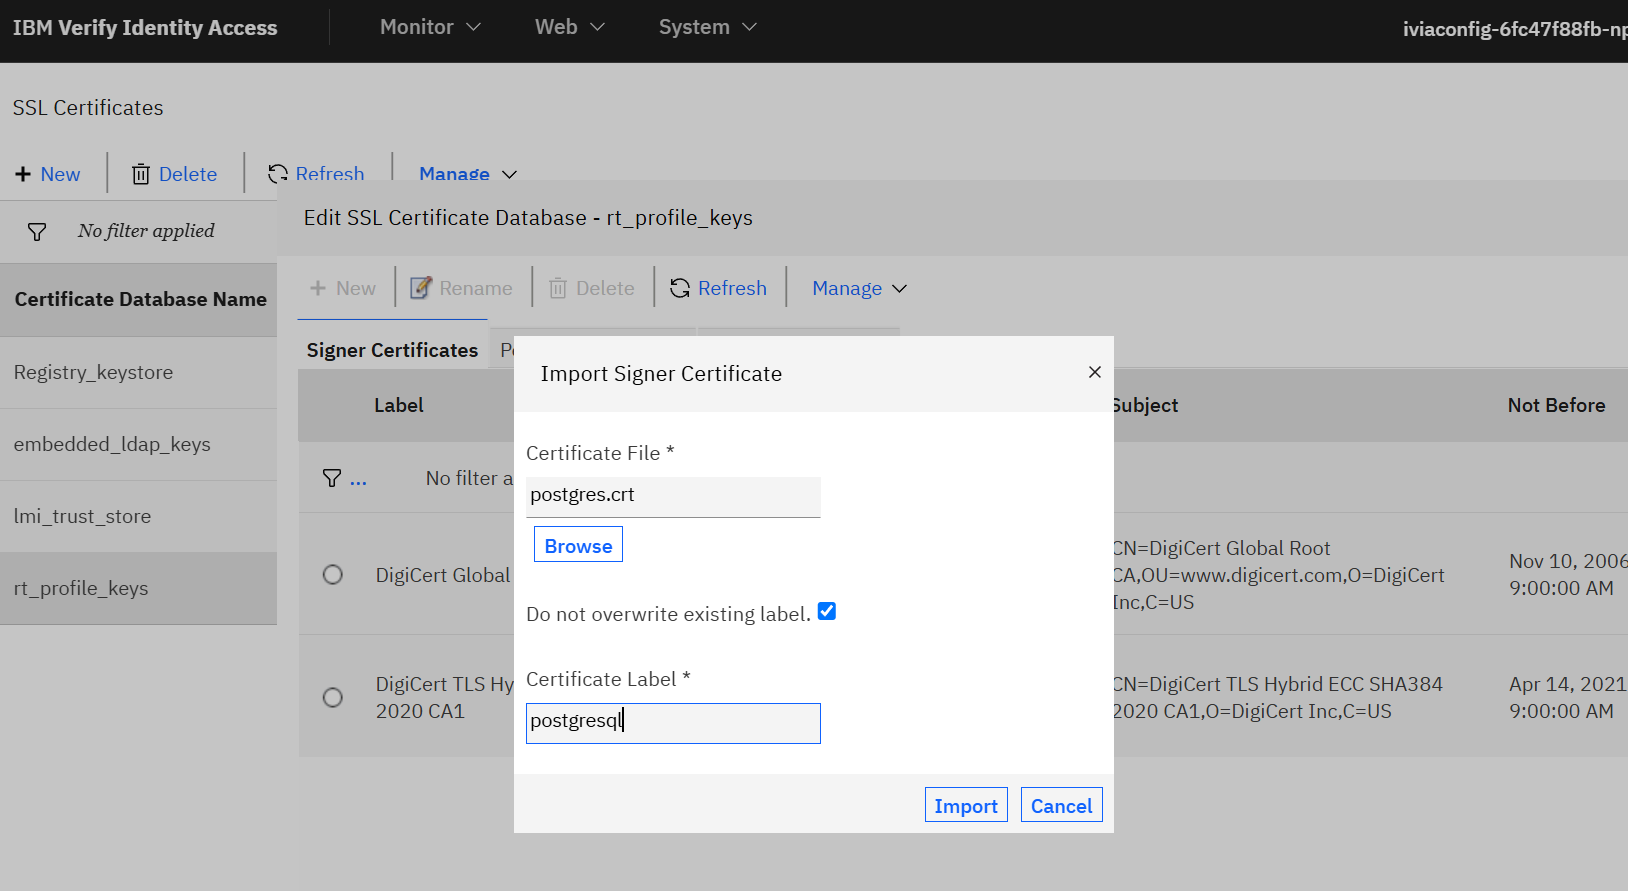
6.2 PostgreSQL certificate
다음은 postgreSQL의 인증서를 추가해줍니다.
lmi_trust_store를 선택 > Edit SSL Certificate Database
Import 선택
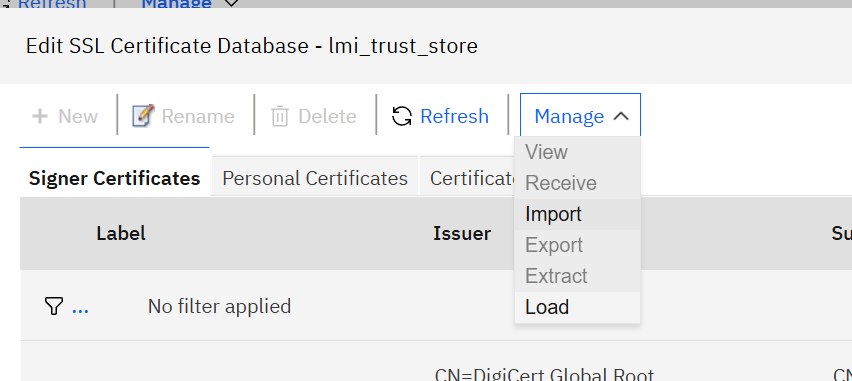
위에서 만들었던 postgreSQL 인증서를 찾아서 첨부
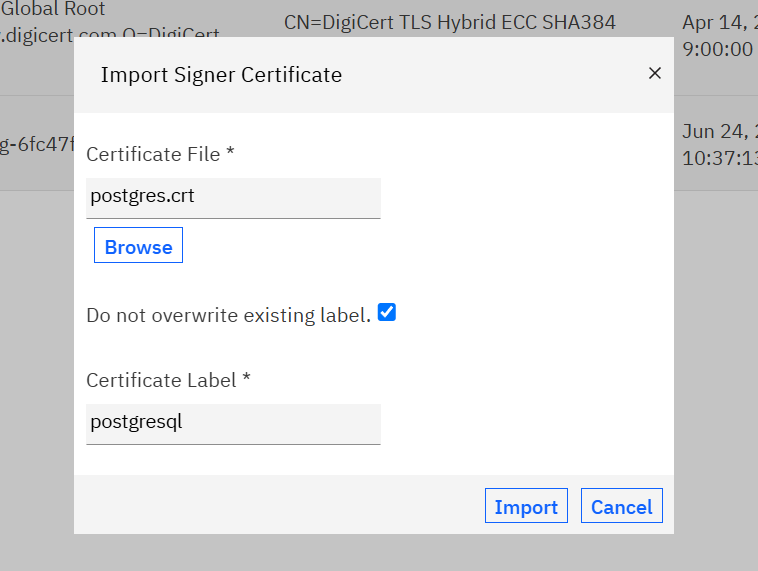
추가하고나서 똑같은 방식으로 rt_profile_keys에도 postgreSQL인증서를 추가해주면 됩니다.
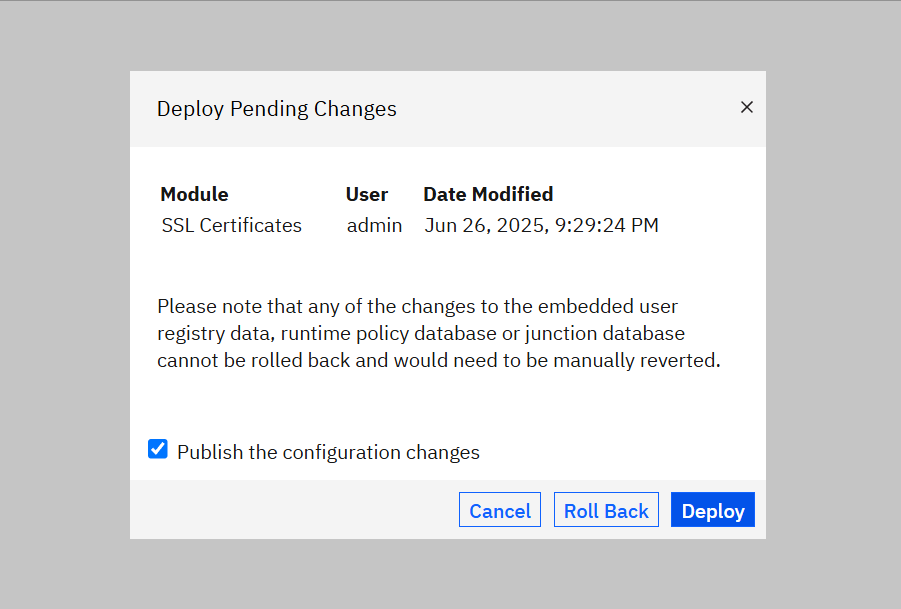
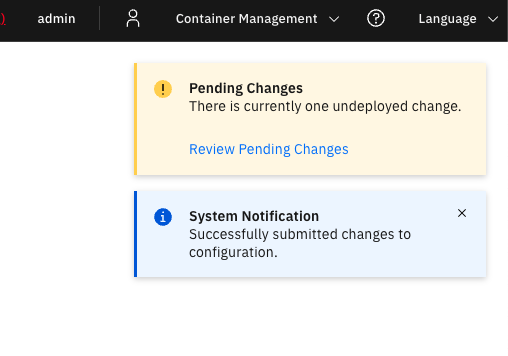
인증서를 추가해주고 나면 오른쪽 상단에 노란색으로 경고창이 뜹니다.
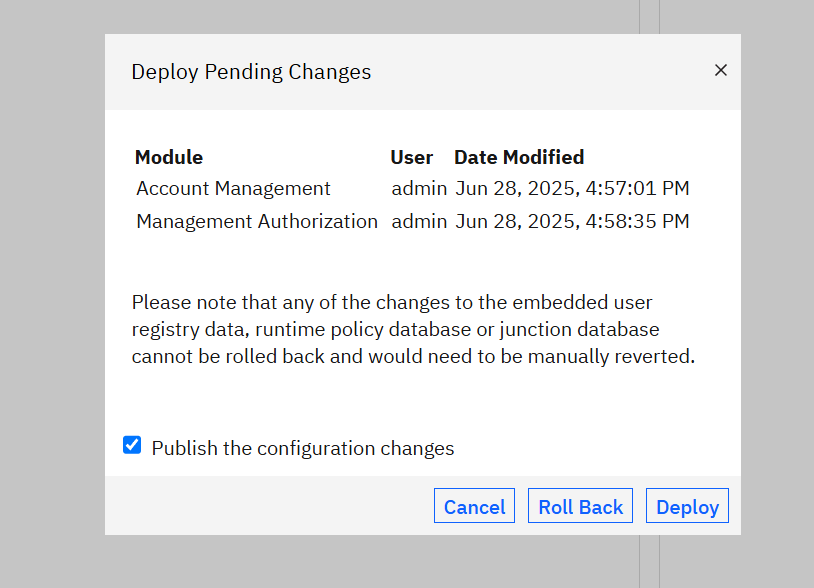
Review Pending Changes를 선택하고,

변경 사항들을 deploy 해줍니다.
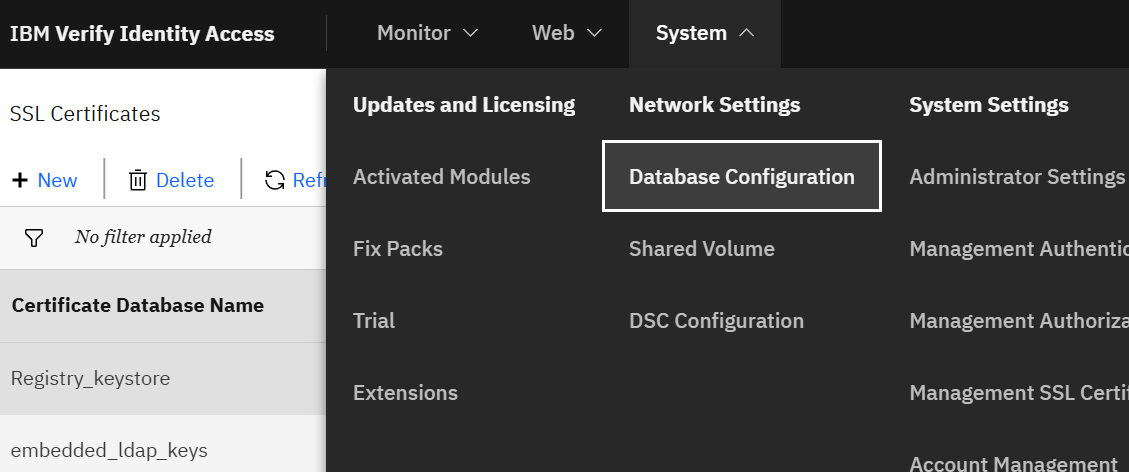
6.3 Runtime Database
Runtime Database를 구성하겠습니다.
System > Network Settings > Database Configuration
이번 문서에서는 Runtime Database로 PostgreSQL을 사용할 것이지만, Db2, Oracle 등의 DB를 사용할 수 있습니다.
아래와 같이 위에서 생성했던 postgreSQL의 정보를 입력해줍니다.
현재 config pod와 postgresql pod가 동일 namespace에 떠있으니 url이나 ip를 적지 않고 service 이름만 address에 적어줘도 충분합니다.
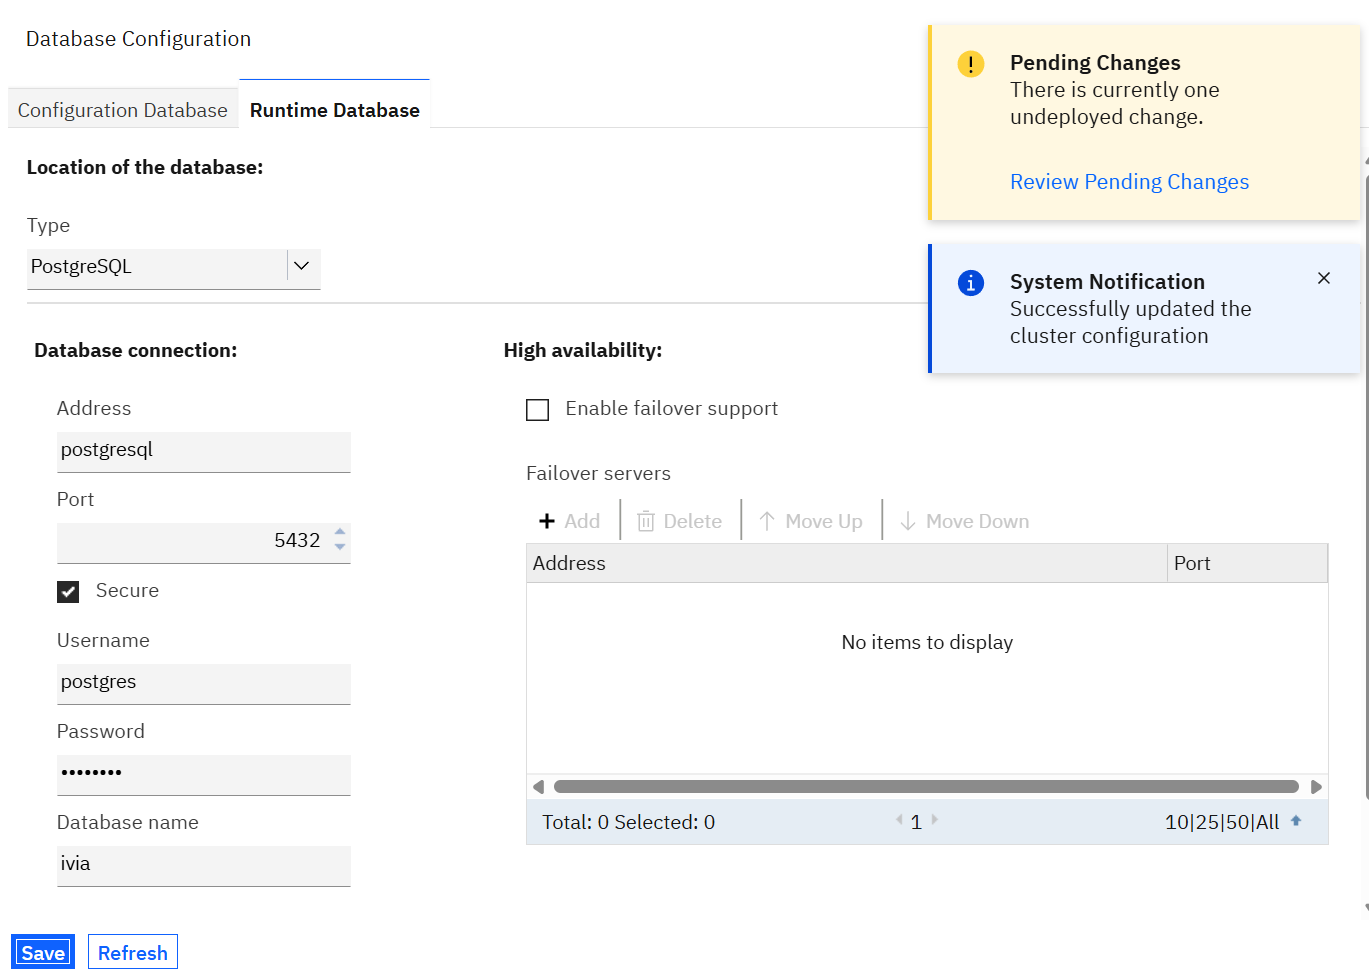
Save버튼을 누르면 connection테스트를 하고 정상적으로 연결되었다면 우측 상단의 pending change 버튼을 눌러 변경사항을 적용시켜줍니다.

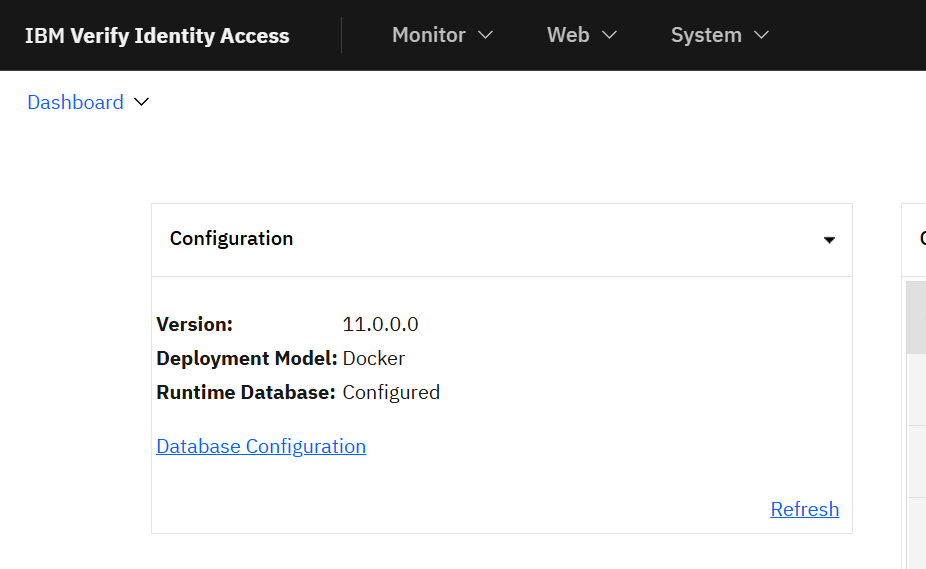
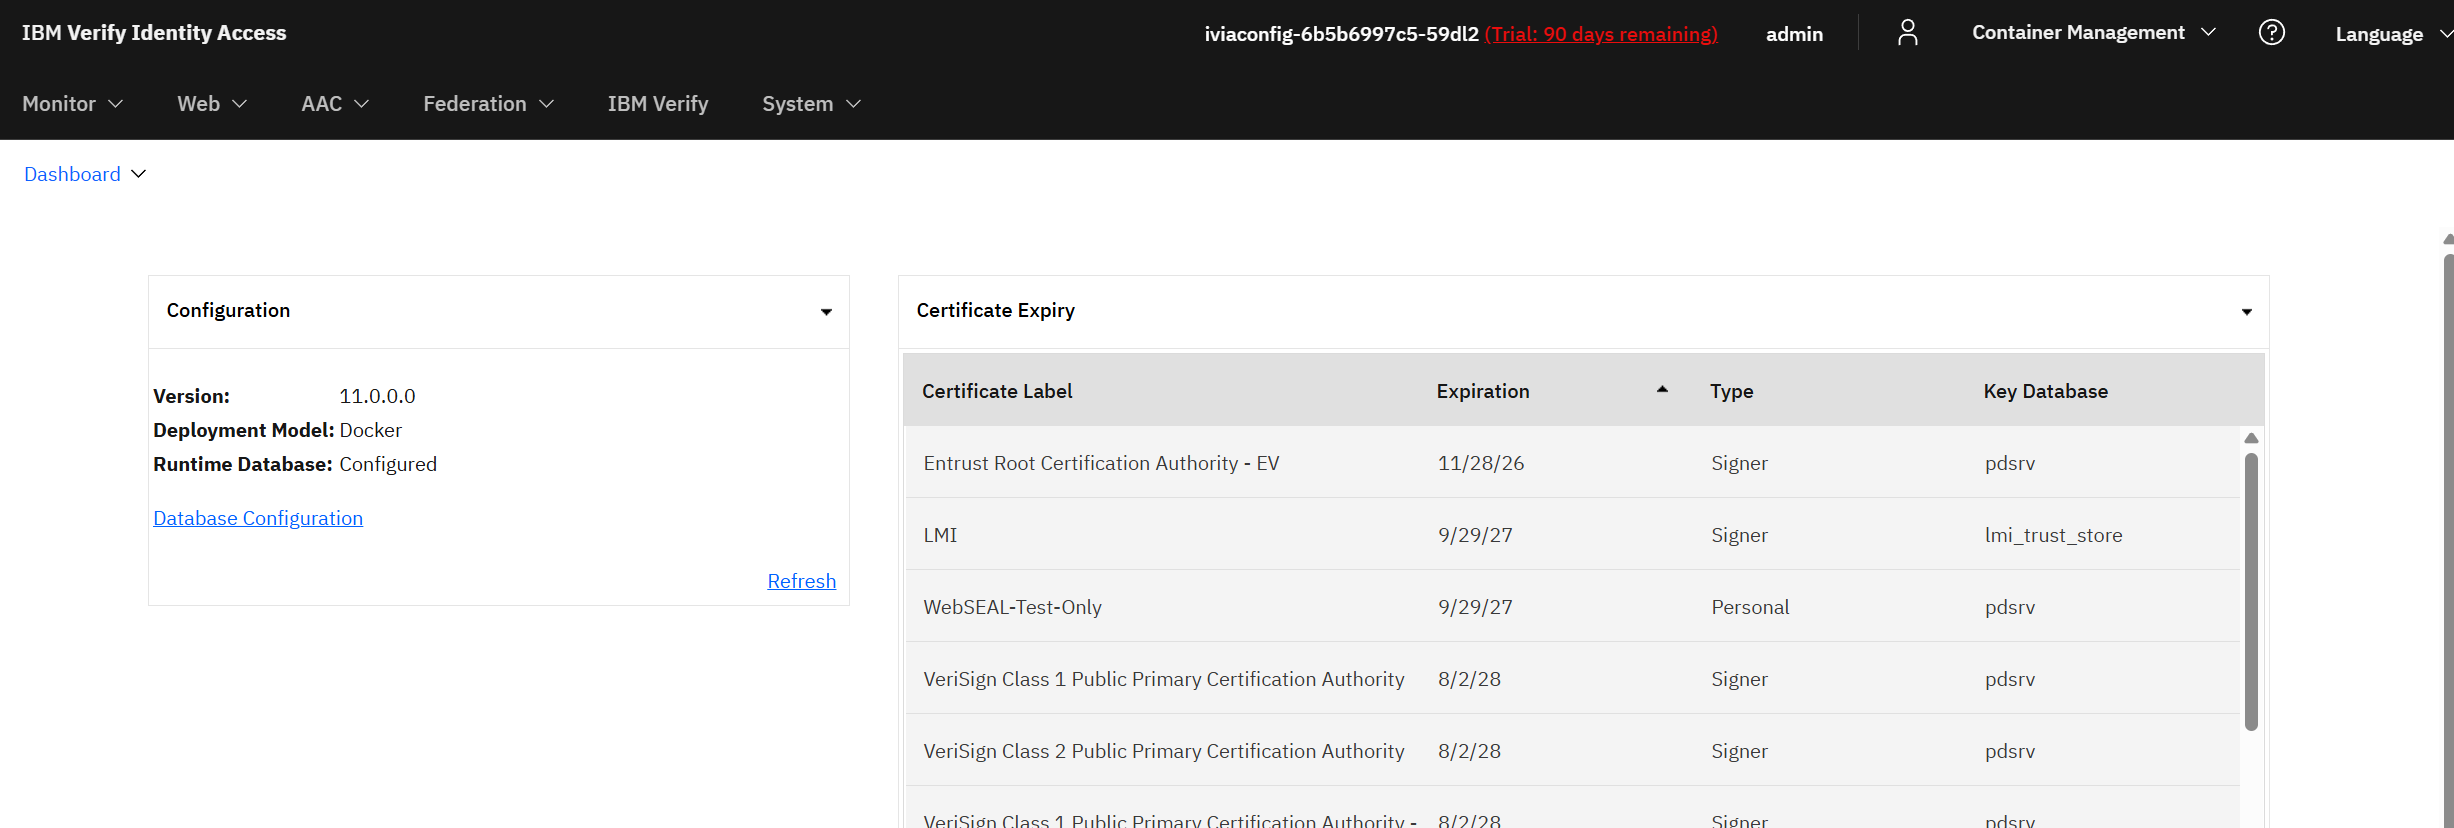
그러고 나면 대시보드 화면에서 Runtime Database가 Configured 상태로 변경된 것을 확인할 수 있습니다.
6.4 Trial 적용
IVIA의 full 기능을 사용하기 위해서는 라이센스 등록이 필요합니다.
Trial license를 발급받아 적용시켜보도록 하겠습니다.
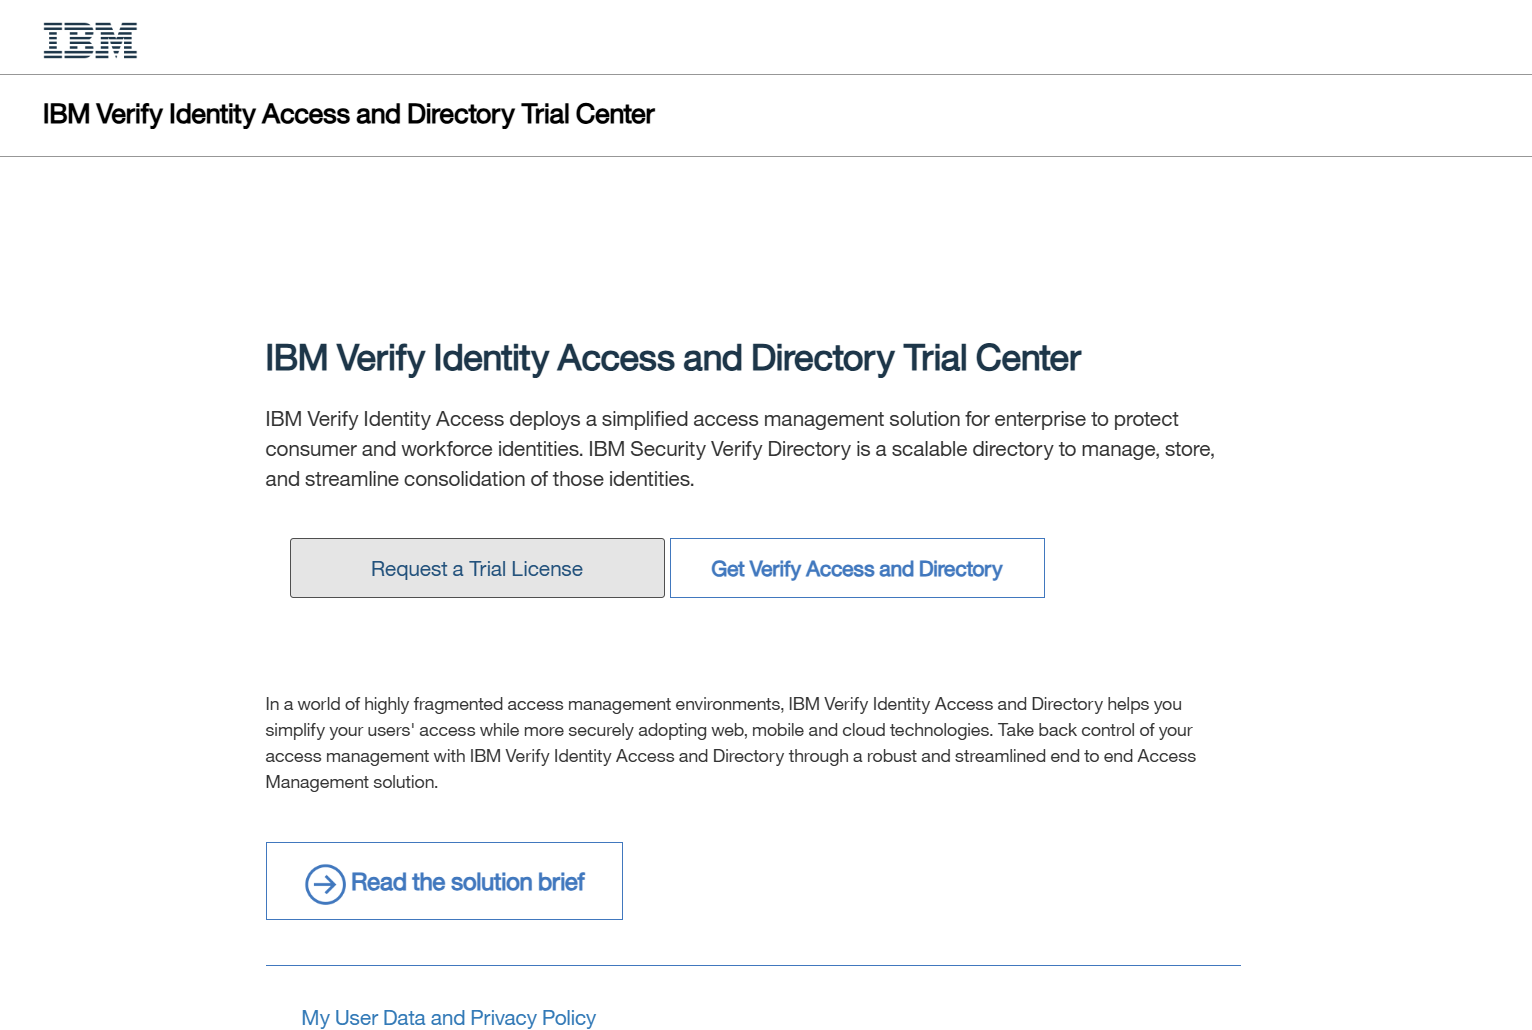
-> https://isva-trial.verify.ibm.com/
Request a Trial License 클릭
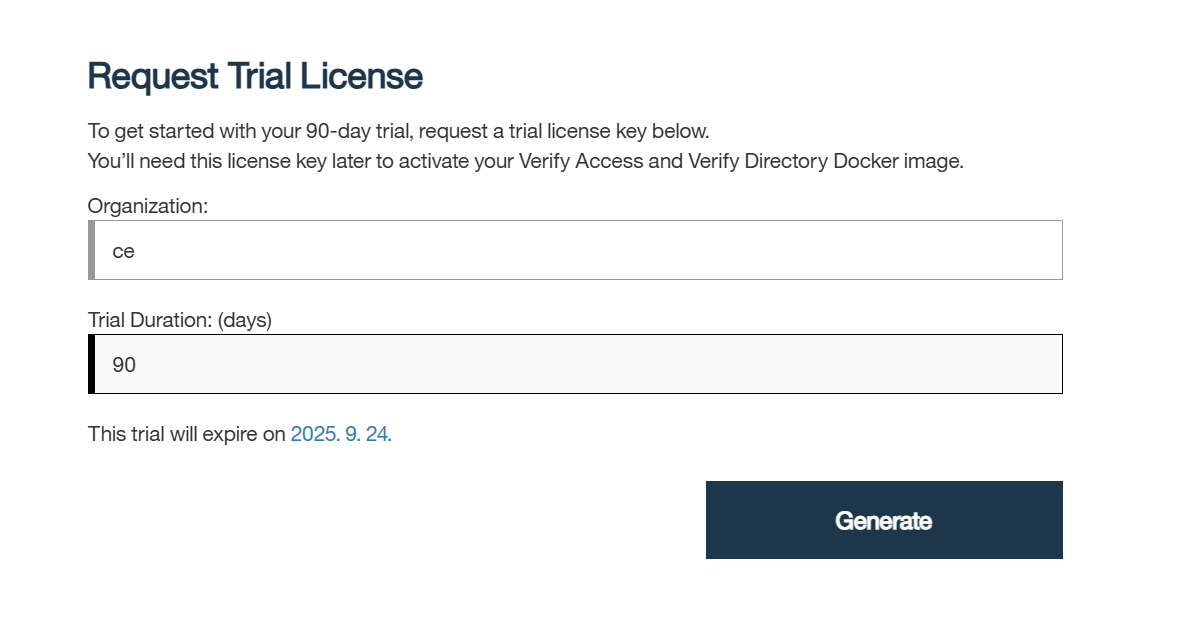
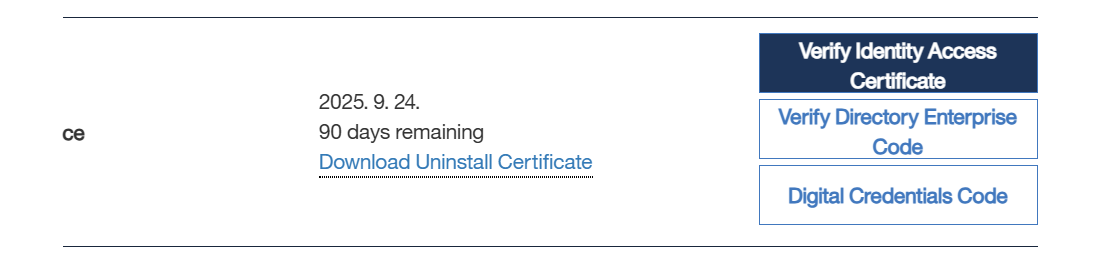
생성하고나면 90일간의 trial license를 발급받게 됩니다.
Verify Identity Access Certificate를 다운로드 받아줍니다.
다시 verfy 콘솔로 돌아가서 System > Trial
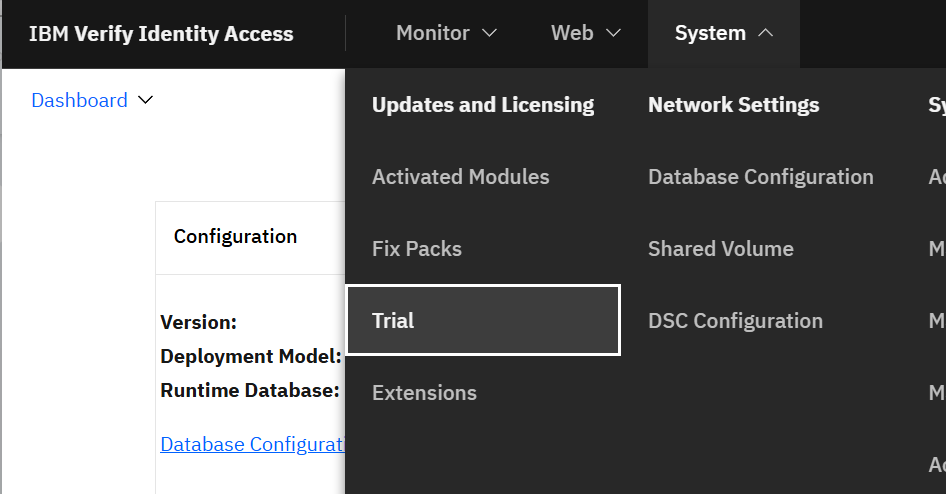
Import를 누르고 위에서 다운로드 받은 certificate를 추가해주면
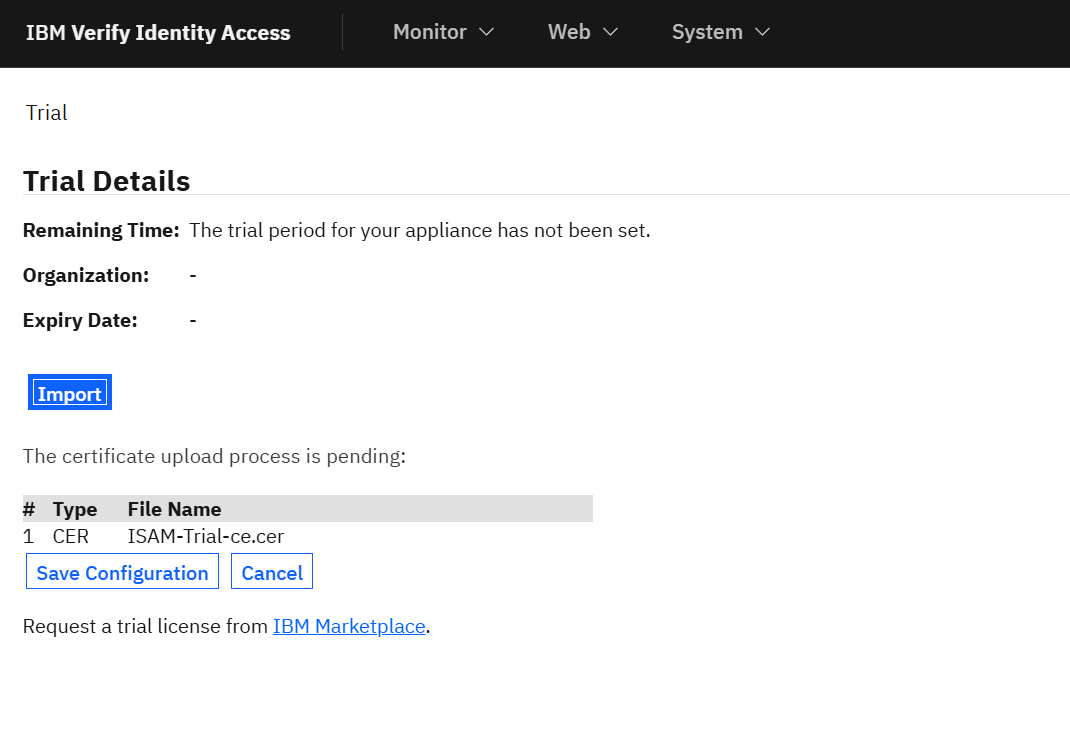
라이센스가 적용되면서 full 메뉴가 보이게 됩니다!
6.5 Config Service user
config pod를 배포할때 넣었던 CONFIG_SERVICE_USER_NAME의 cfgsvc의 password를 설정해주겠습니다.
- name: CONFIG_SERVICE_USER_NAME
  value: cfgsvc
- name: CONFIG_SERVICE_USER_PWD
  valueFrom:
    secretKeyRef:
      name: configreader
      key: cfgsvcpw
⚠️ 이 과정을 진행하지않으면 snapshot deploy하고 snapshot을 가져오는 쪽에서 권한에러가 발생할 수 있습니다.
{"instant":{"epochSecond":1751095525},"threadId":"1","level":"INFO","loggerName":"system","component":"bootstrap","source":{"file":"/sbbootstrap.sh"}, "content":"WGAWA0960I   Downloading data from the configuration service."}
{"instant":{"epochSecond":1751095525},"threadId":"1","level":"INFO","loggerName":"system","component":"bootstrap","source":{"file":"/sbbootstrap.sh"}, "content":"WGAWA0961I   The configuration snapshot file is not currently available from the configuration service!"}
{"instant":{"epochSecond":1751095525},"threadId":"1","level":"INFO","loggerName":"system","component":"bootstrap","source":{"file":"/sbbootstrap.sh"}, "content":"WGAWA0969I   No configuration snapshot detected. The container will wait for a configuration snapshot to bec available."}
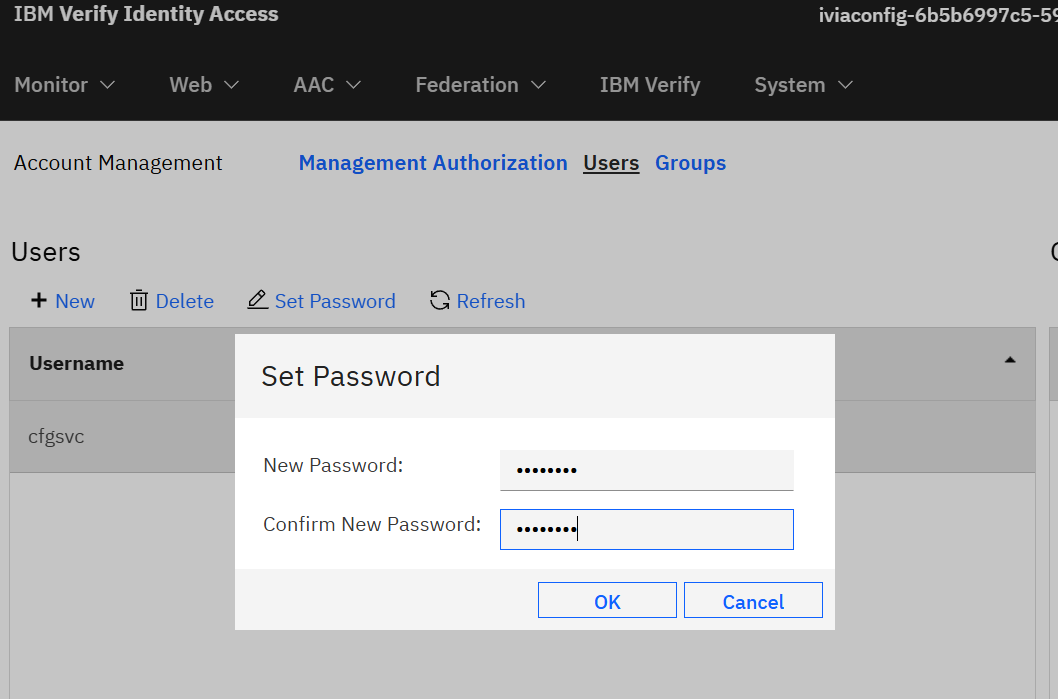
System > System Settings > Account Management > Users 이동
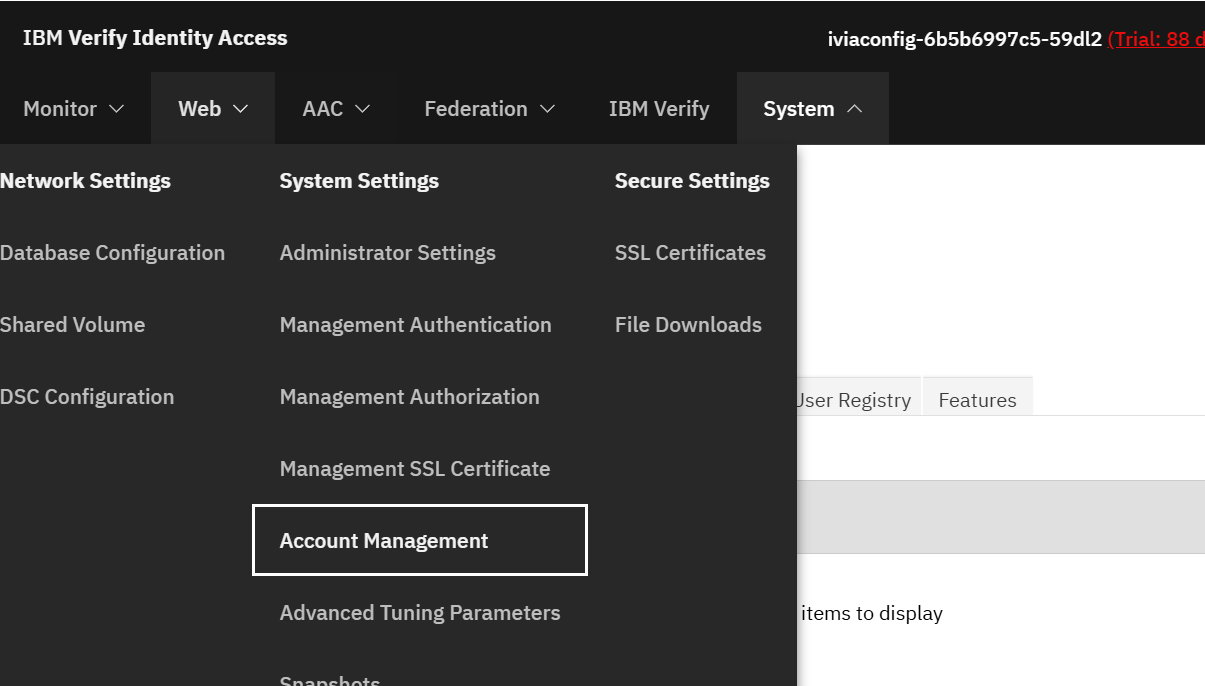
cfgsvc 유저를 선택하고 새로운 패스워드를 설정해줍니다.
다음으로 Management Authorization 탭으로 이동해서 Enable Authorization Roles를 체크해주면 됩니다.
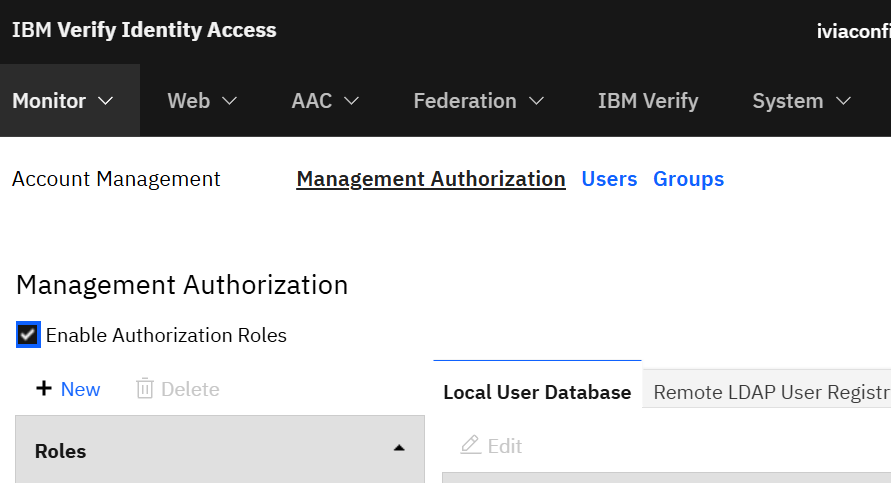
다 마치면 deploy!
6.6 Runtime Component
IVIA의 베이스 런타임을 구성해주도록 하겠습니다.
LDAP을 연결하고 ACL, Protect object policy들의 초기 Policy DB를 생성할 것입니다.
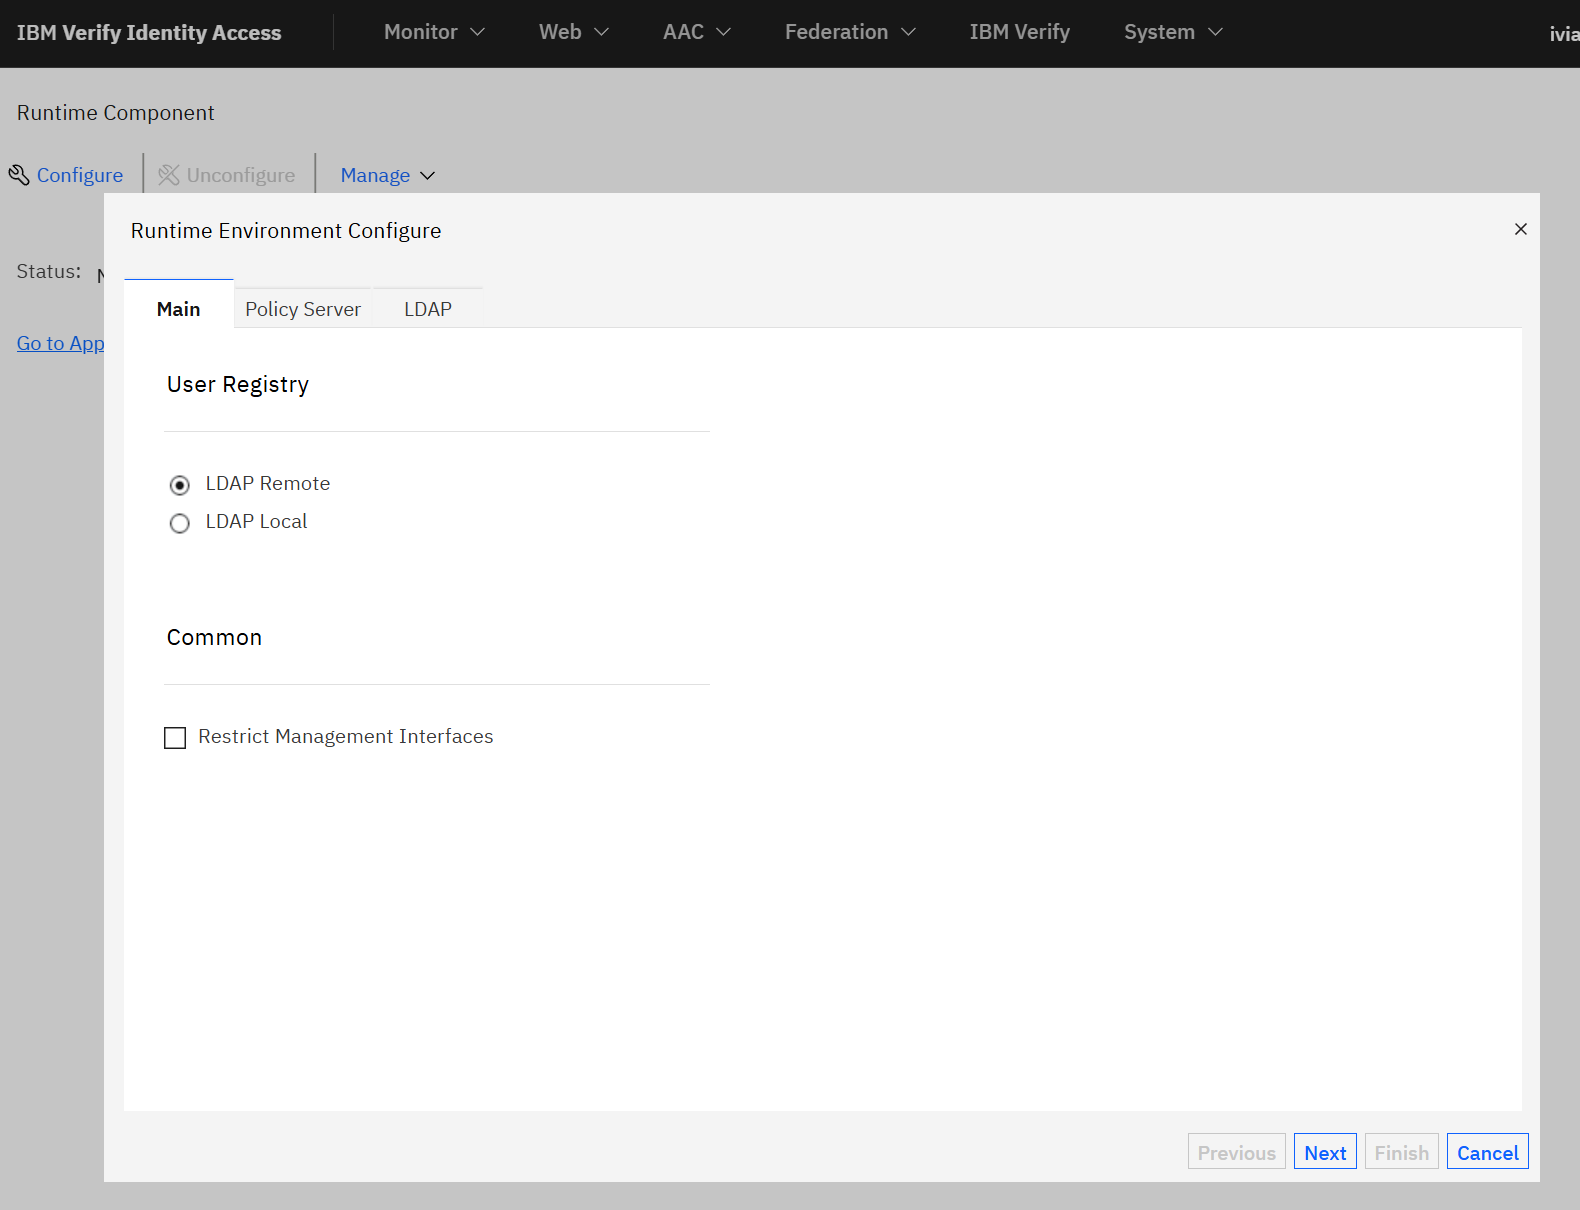
Web > Manage > Runtime Component로 이동
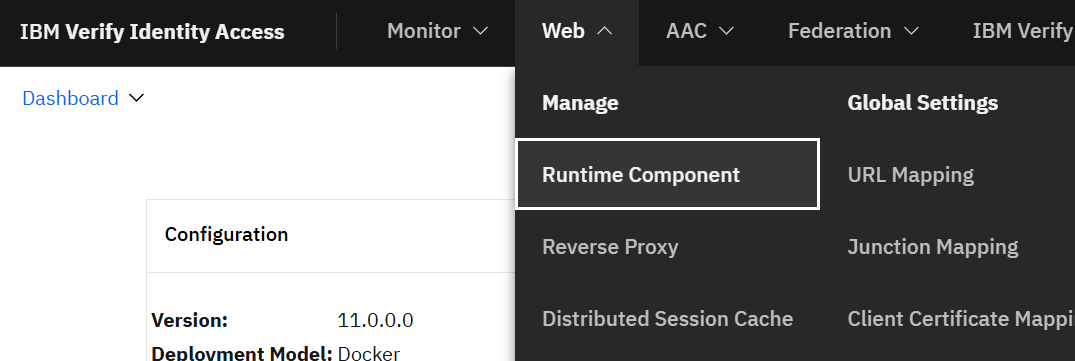
Configure버튼 선택, User Registry로 LDAP Remote 선택
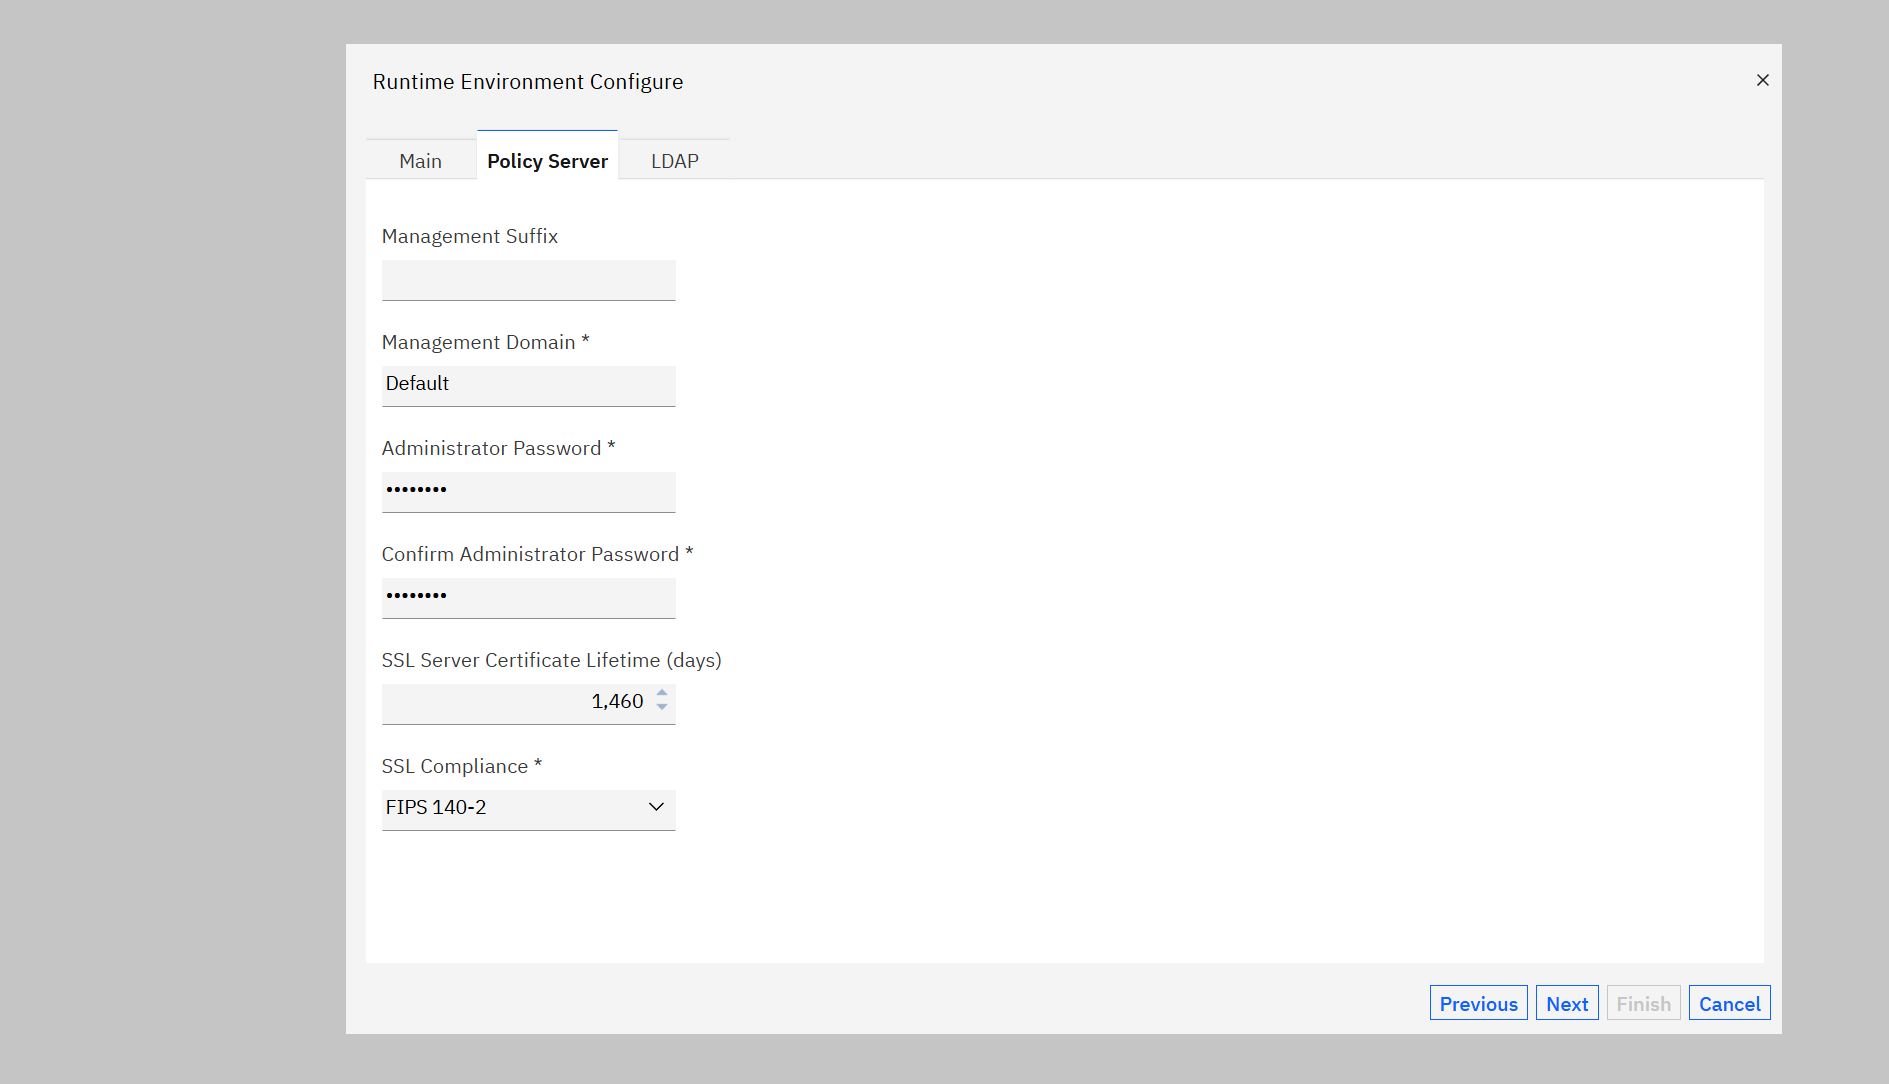
Policy Server 탭으로 이동해서 관리자(admin)의 패스워드를 입력해줍니다.
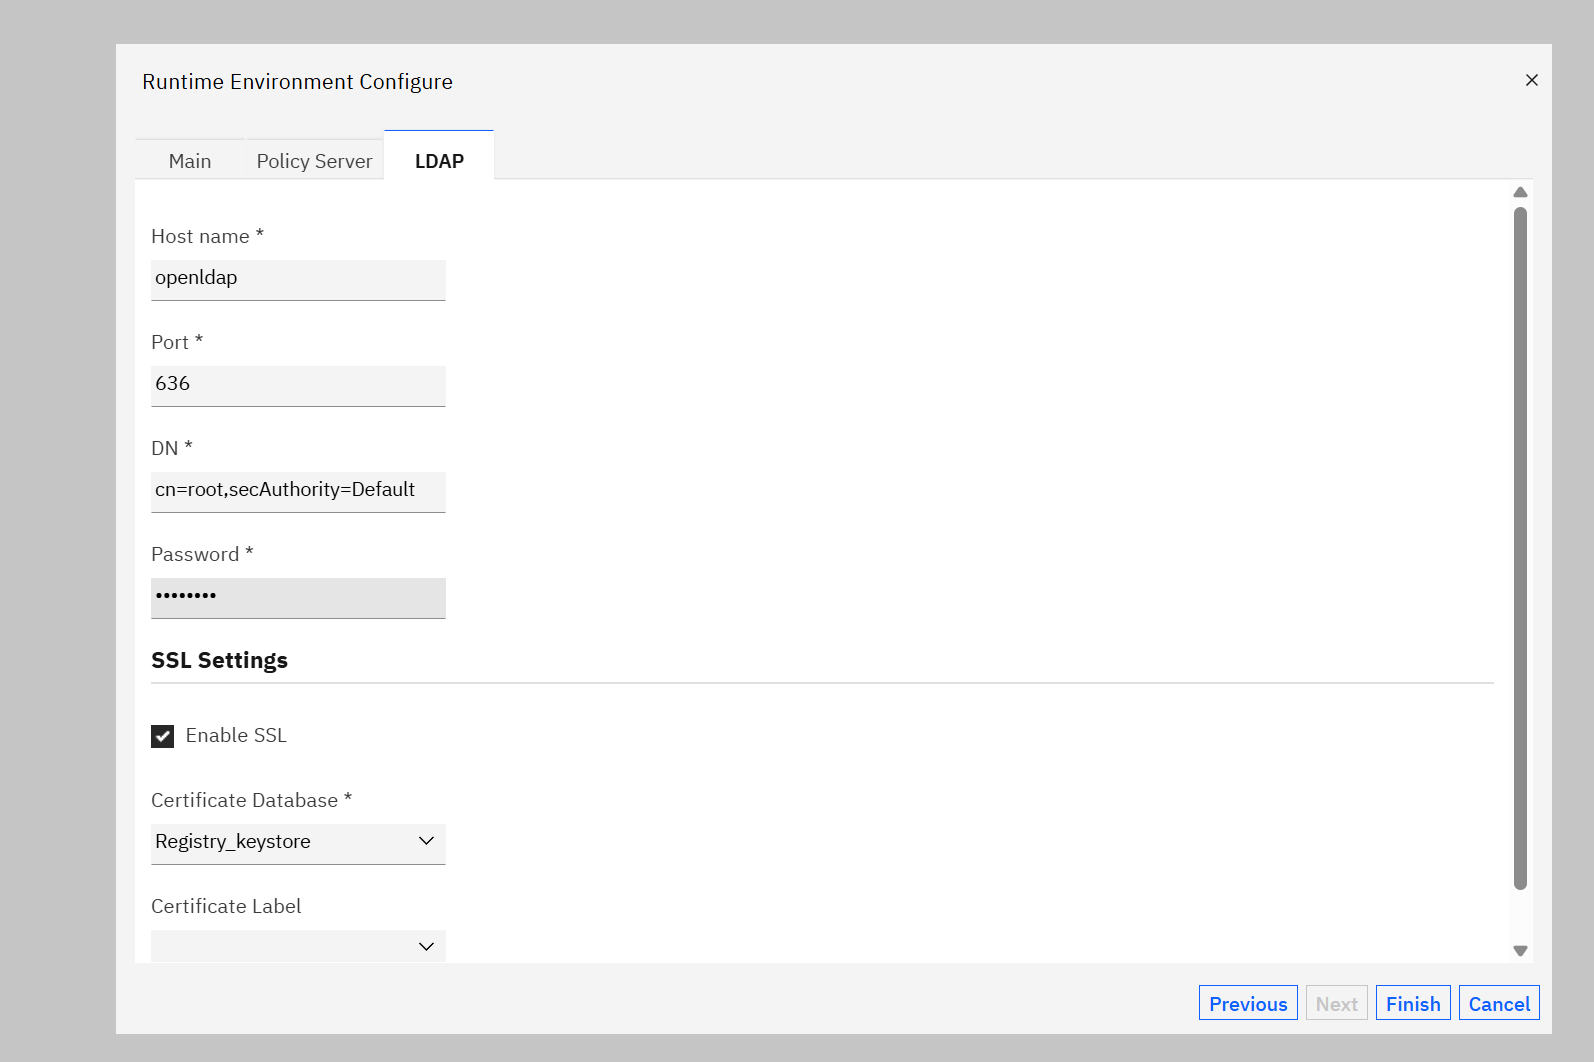
LDAP탭으로 이동해서, openLDAP의 Host Name(서비스 이름), port, DN과 Ldap 인스턴스 만들때 넣었던 초기 비밀번호를 입력해줍니다.
DN은 아래 정보로 입력:
cn=root,secAuthority=Default
SSL settings에서는 SSL을 활성화시키고, Certificate Database는 위에서 만들었었던 LDAP의 keystore이름을 선택해주면 됩니다.
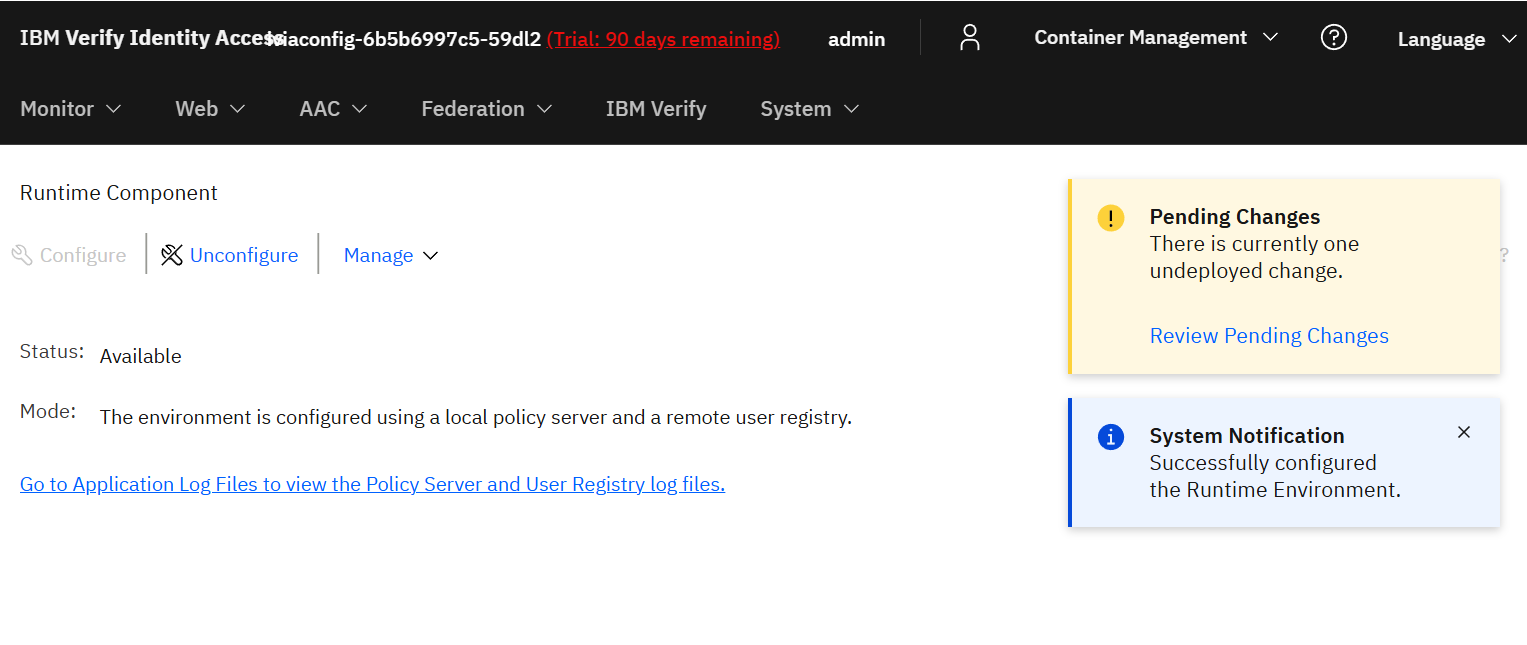
잘 연결되면, status가 available로 바뀝니다.
6.7 Reverse Proxy
이번엔 reverse proxy를 설정해보겠습니다.
Web > Manage > Reverse Proxy 로 이동
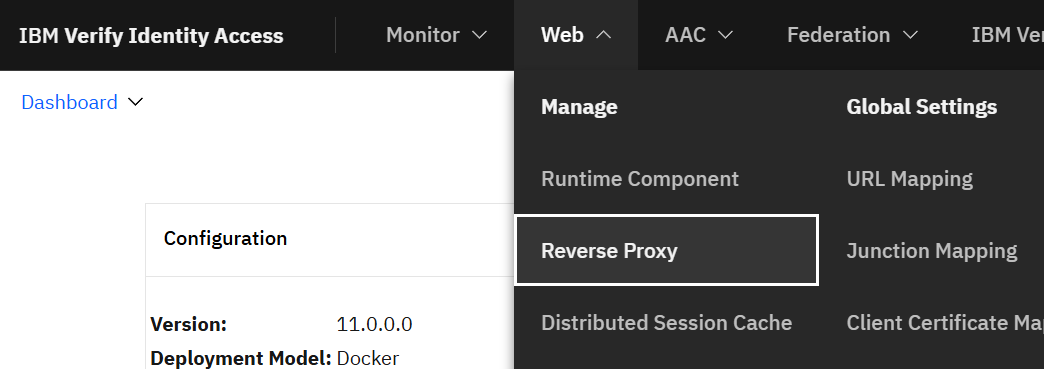
new 눌러서 새로운 reverse proxy를 만들겠습니다.
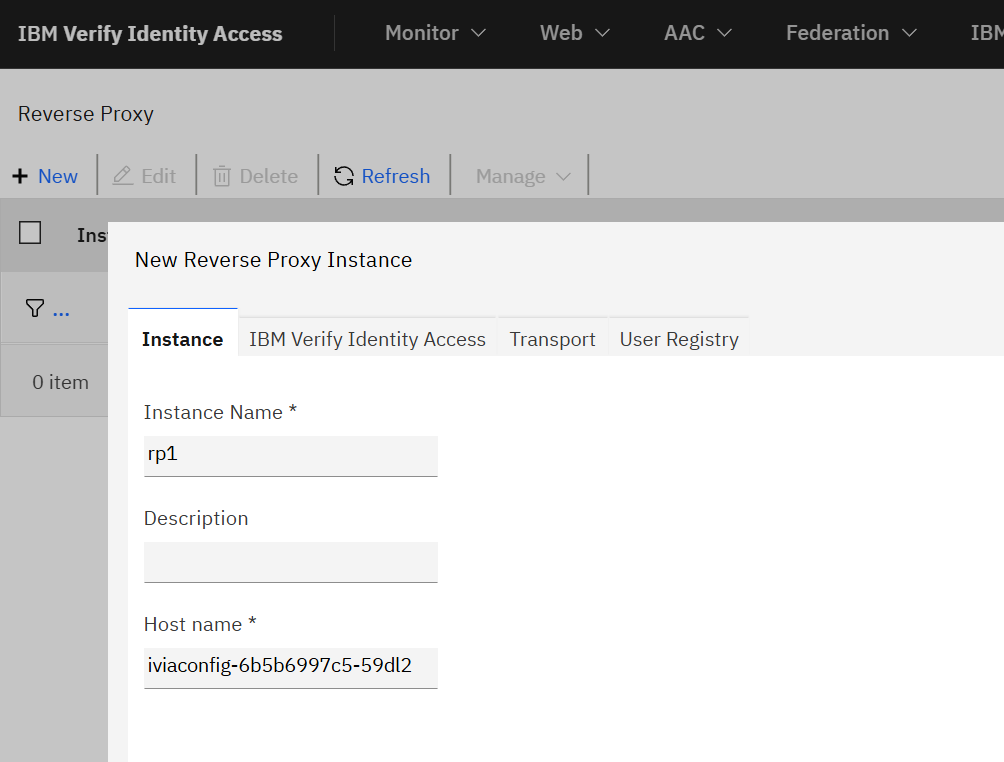
Instance Name은 web reverse proxy Deployment를 만들때 넣었던 INSTANCE변수의 값과 일치하게 설정해주어야 합니다.
env:
  - name: INSTANCE
    value: rp1
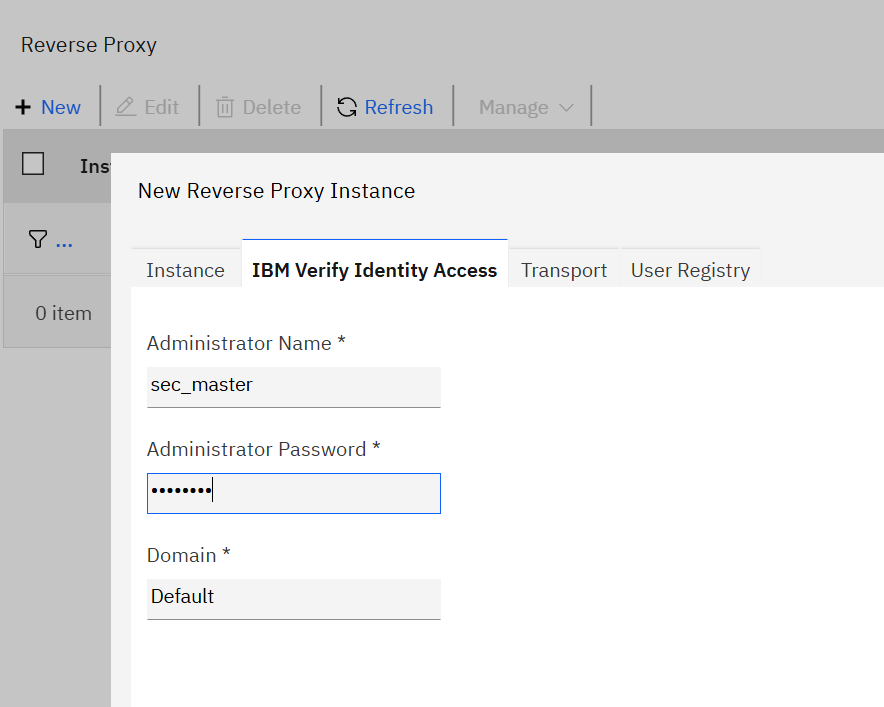
IBM Verify Identity Access 탭으로 넘어가서, admin의 password를 입력해줍니다.(여기선 Passw0rd)
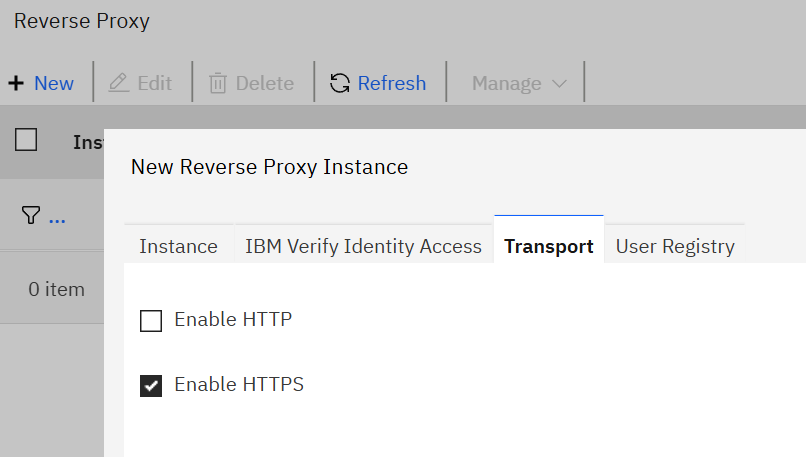
Transport탭에서는 HTTPS를 활성화 시켜주고,
User Registry탭으로 이동하여 SSL활성화, Key File Name으로는 위에서 설정했었던 OpenLDAP의 keystore를 선택해주면 됩니다.
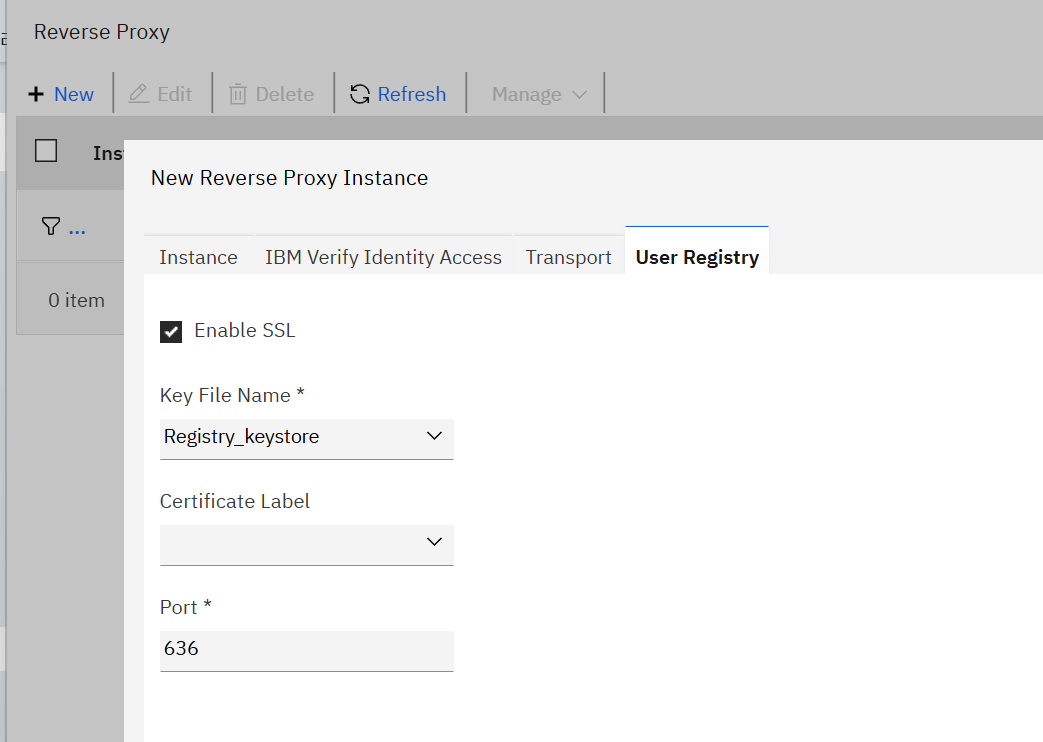
정상적으로 구성되면 deploy시켜줍니다.
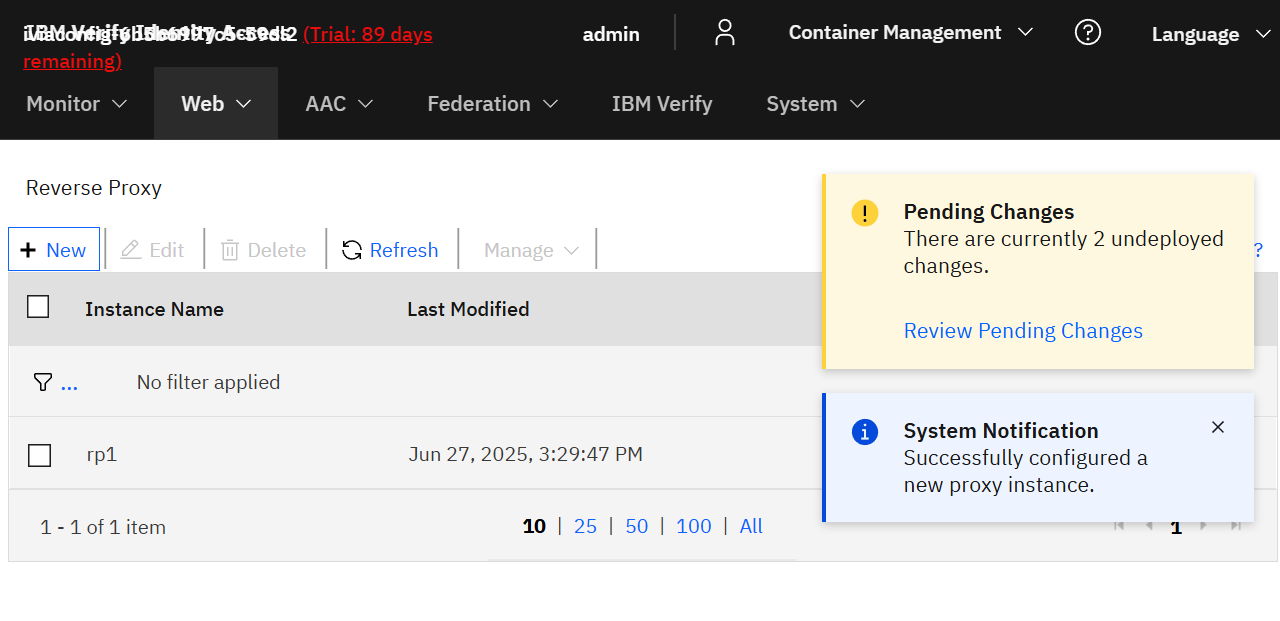
생성했던 reverse proxy를 선택하고 Manage > Configuration > Edit Configuration File으로 이동합니다.

reverse proxy의 상세 configuration들을 확인할 수 있습니다.
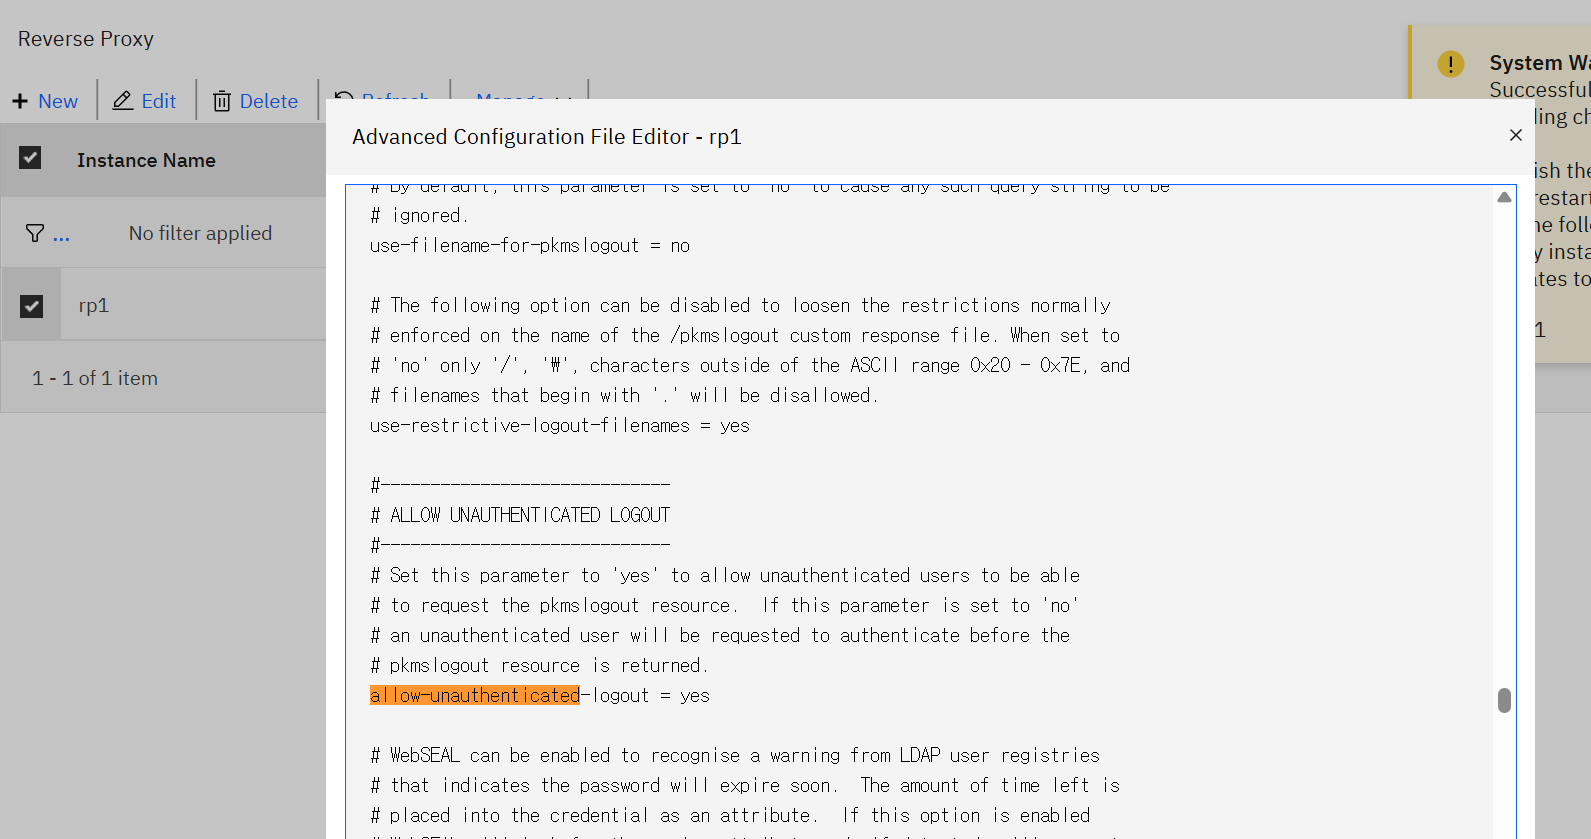
테스트를 위해 allow-unathenticated-logout = no를 yes로 변경해줍니다.
yes면 인증되지 않은 유저가 pkmslogout 로그아웃 리퀘스트를 할 수 있게되고,
no면 인증되지 않은 유저가 pkmslogout 리퀘스트를 날릴때 무조건 로그인을 하도록 리다이렉트됩니다.
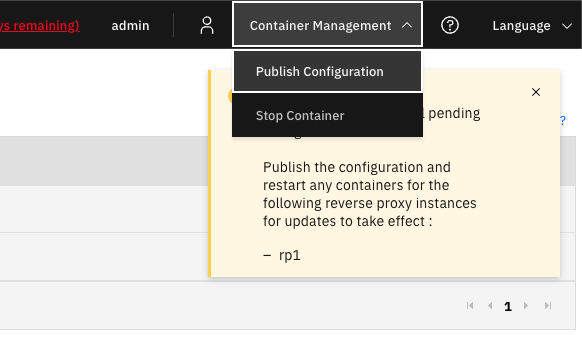
구성을 마쳤으면 우측 상단의 Container Management를 선택해 “Publish Configuration”을 눌러서 구성 스냅샷을 만들어줍니다.
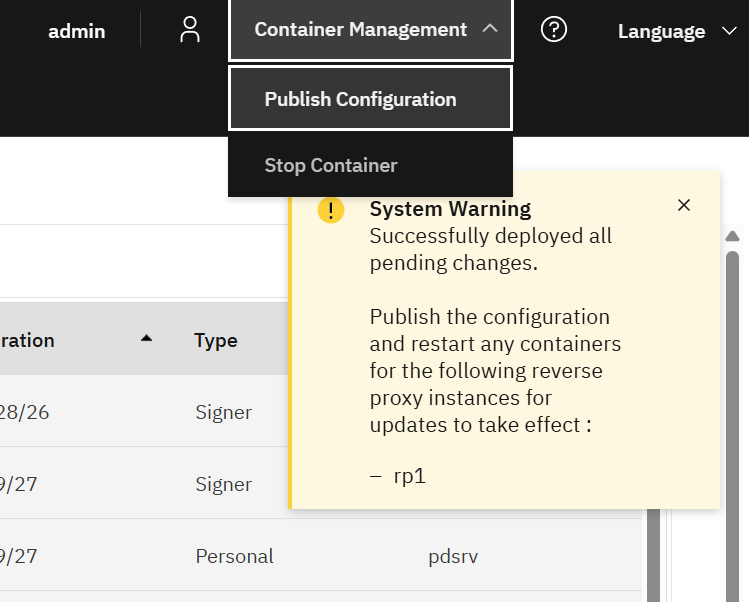
그리고나서 pod들의 상태를 확인해보면 아래와 같이 wrp와 runtime pod가 정상적으로 도는 것을 확인할 수 있습니다.
$ oc get pod
NAME                           READY   STATUS             RESTARTS         AGE
iviaconfig-6b5b6997c5-59dl2    1/1     Running            0                44h
iviadsc-7c45c44556-kjgzg       0/1     CrashLoopBackOff   35 (2m42s ago)   145m
iviaop-dc5c69d89-rt55z         1/1     Running            1 (3d6h ago)     3d6h
iviaruntime-6c84c6dc47-7m8c2   1/1     Running            13 (73m ago)     145m
iviawrprp1-5fbd4489d4-tjrd7    1/1     Running            0                70m
openldap-787957c77c-hxqbk      1/1     Running            0                3d6h
postgresql-6764746786-hrwrf    1/1     Running            0                3d6h
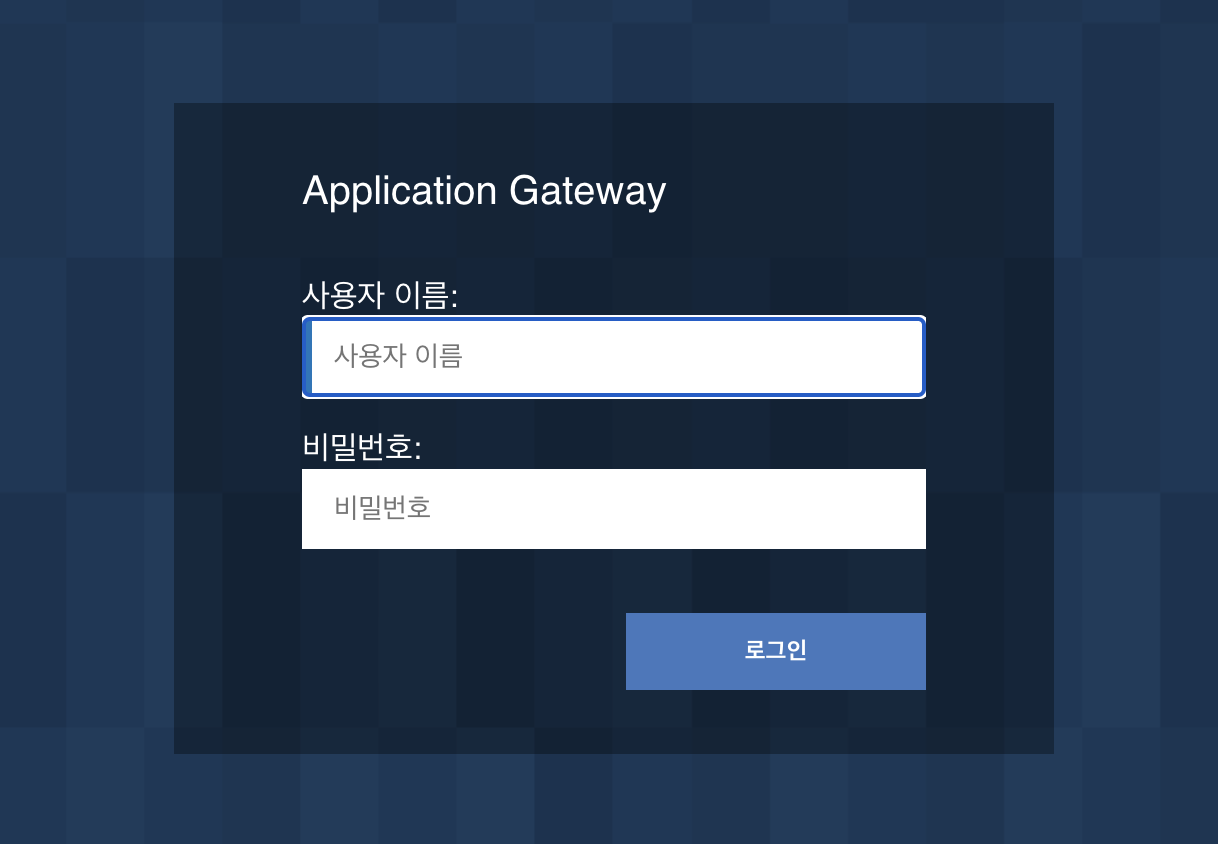
reverse proxy의 route주소를 눌러보면 아래와 같이 로그인창이 뜨게되는데, sec_master/Passw0rd로 로그인을 시도해보겠습니다.
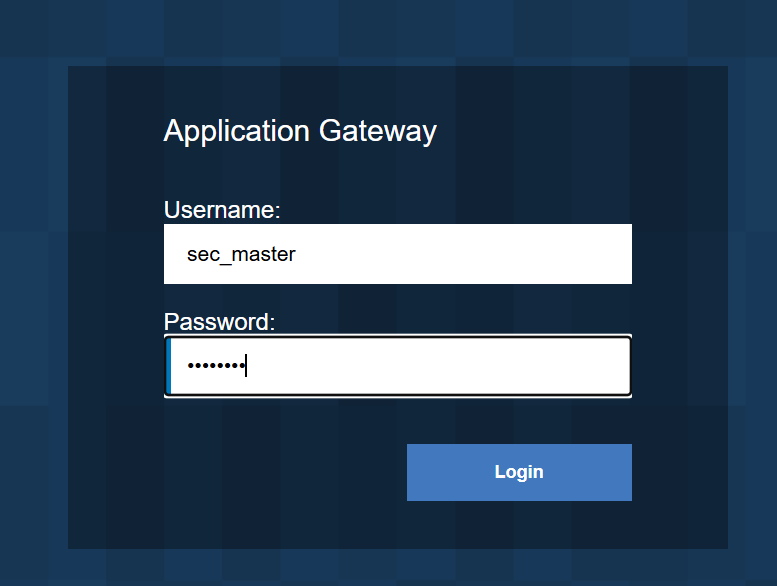
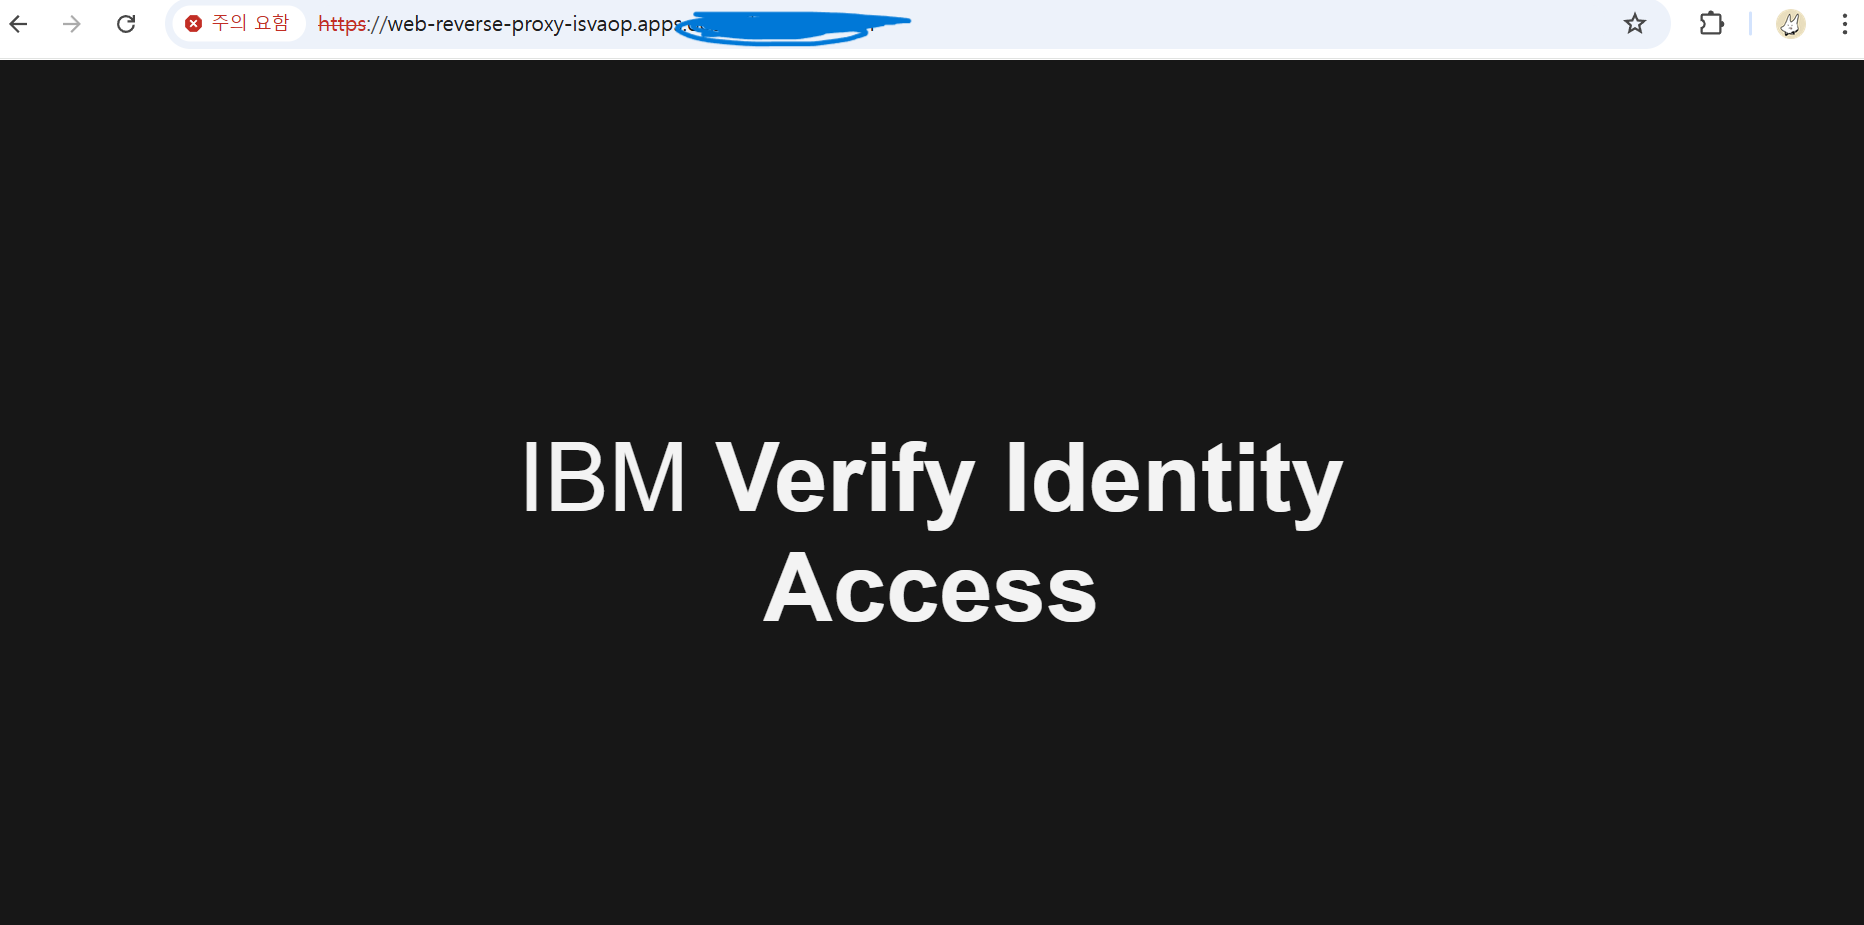
로그인이 성공하여 샘플 페이지로 이동,
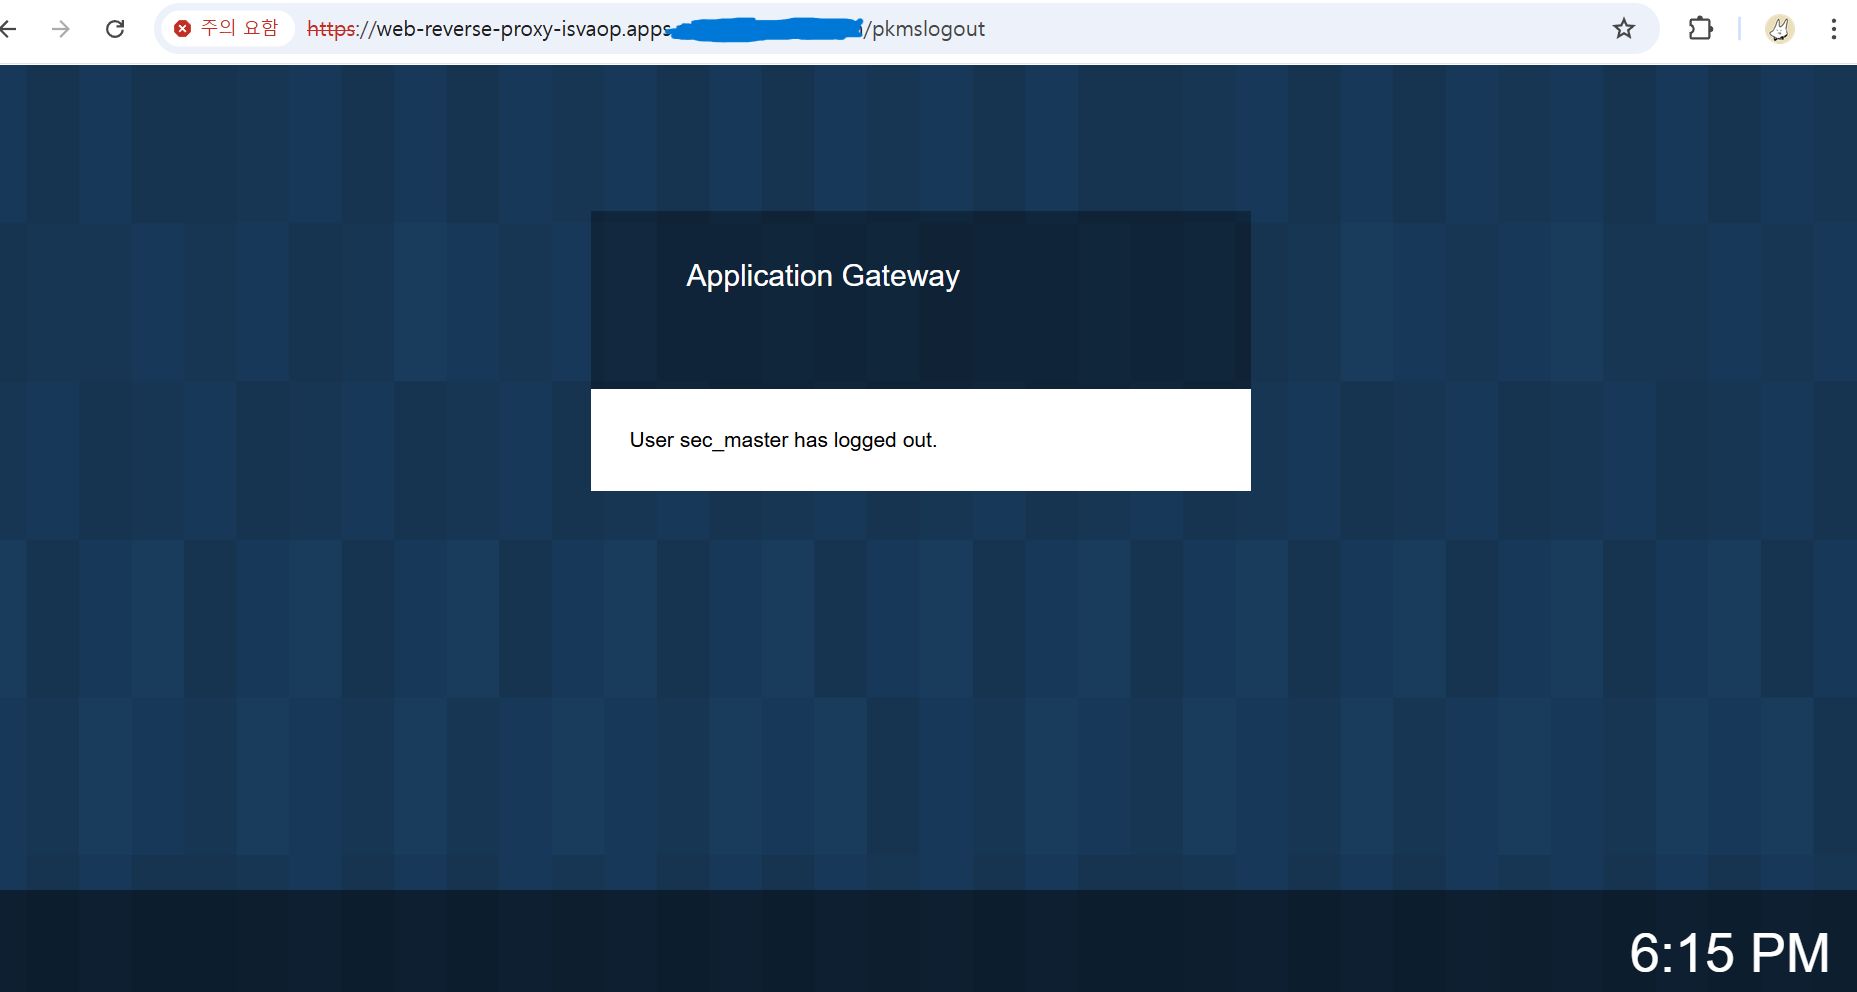
/pkmslogout을 url뒤에 붙여서 정상적으로 로그아웃되는 것도 확인할 수 있습니다.
6.8 DSC(Distributed Session Cache)
마지막으로 Distributed Session Cache를 설정해보겠습니다.
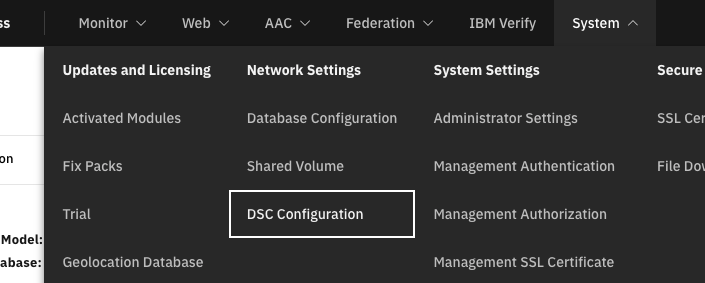
System > Network Settings > DSC Configuration
dsc 서비스를 참고해서 정보를 입력해줍니다.
apiVersion: v1
kind: Service
metadata:
  name: iviadsc
spec:
  ports:
    - port: 9443
      name: iviadsc-svc
      protocol: TCP
    - port: 9444
      name: iviadsc-rep
      protocol: TCP
  selector:
    app: iviadsc
Service Port : 9443
Replication Port : 9444
Address : iviadsc(service name)
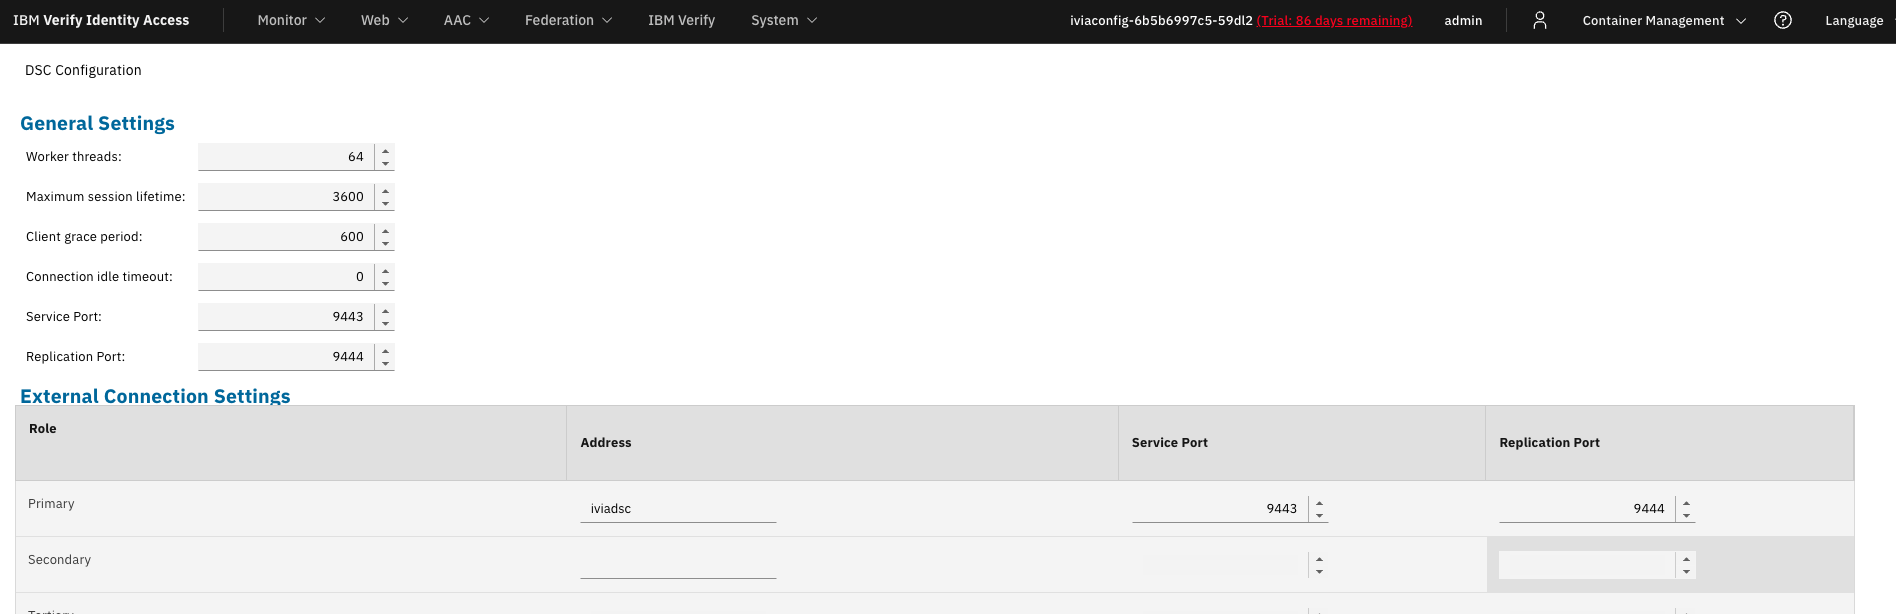
저장하고 deploy해줍니다.
이제 reverse proxy가 해당 dsc를 사용하도록 설정해주겠습니다.
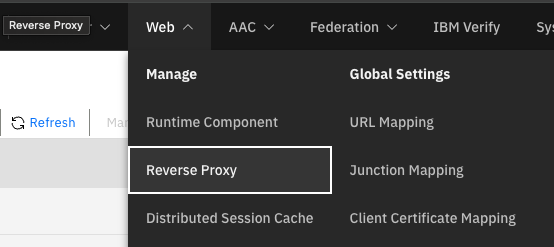
Web > Manage > Reverse Proxy
reverse proxy 선택 > edit > sessions 탭 > enable distributed sessions 체크 > save
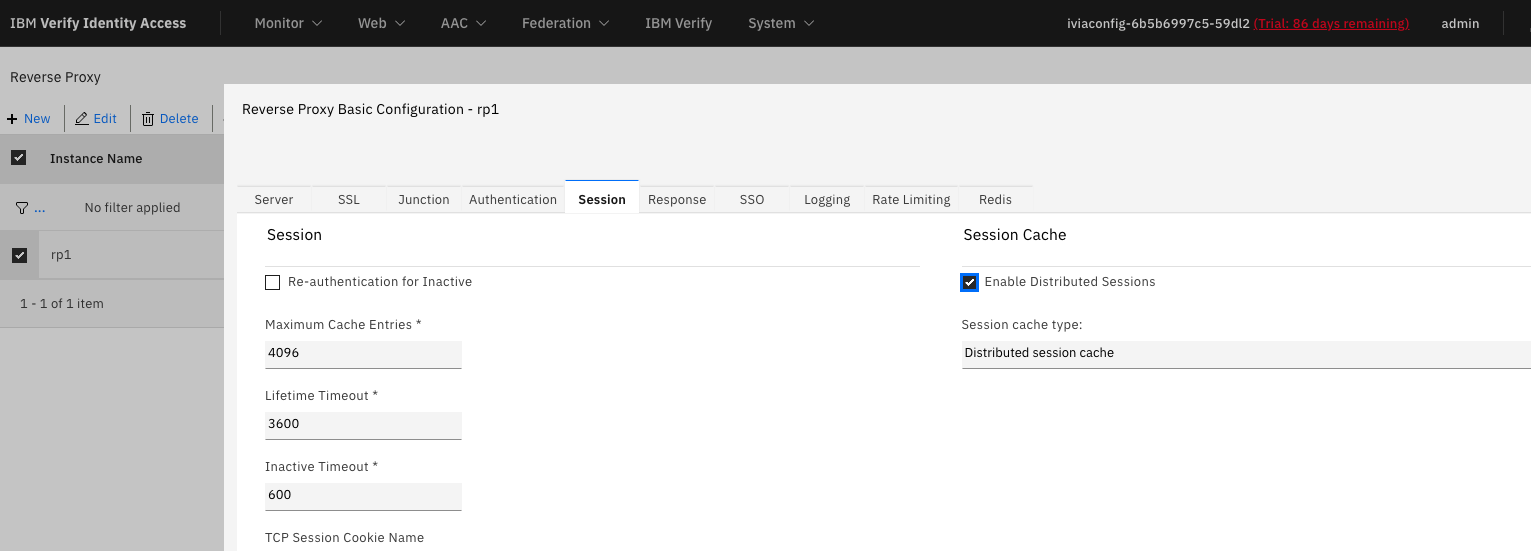
Publish Configuration!
이제 dsc pod가 정상적으로 도는 것을 확인할 수 있습니다!
$ oc get pod
NAME                           READY   STATUS    RESTARTS        AGE
iviaconfig-6b5b6997c5-59dl2    1/1     Running   0               3d12h
iviadsc-7c45c44556-v6ldf       1/1     Running   0               3m4s
iviaop-dc5c69d89-rt55z         1/1     Running   1 (4d22h ago)   4d23h
iviaruntime-6c84c6dc47-qjlfj   1/1     Running   0               29s
iviawrprp1-5fbd4489d4-dlk97    1/1     Running   0               39s
openldap-787957c77c-hxqbk      1/1     Running   0               4d22h
postgresql-6764746786-hrwrf    1/1     Running   0               4d22h
제대로 reverse proxy에 dsc가 등록이 되었는지 확인해봅시다.
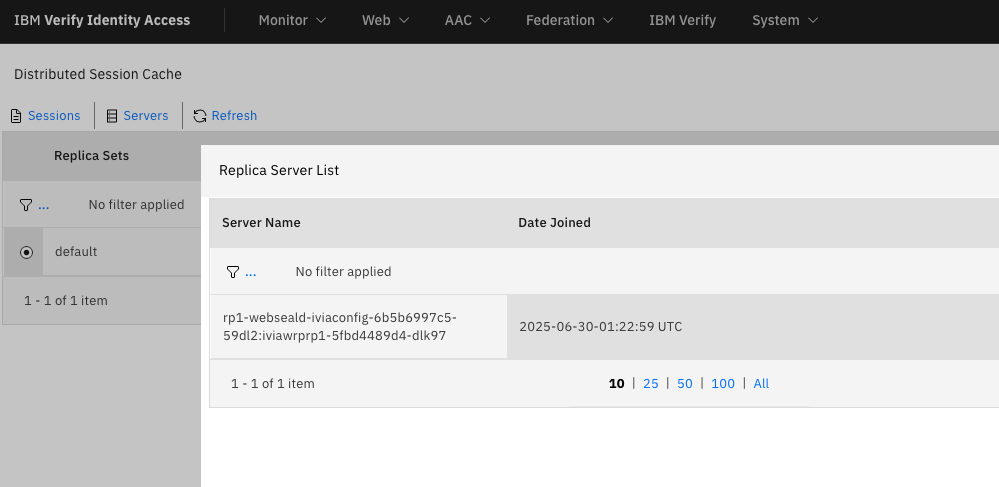
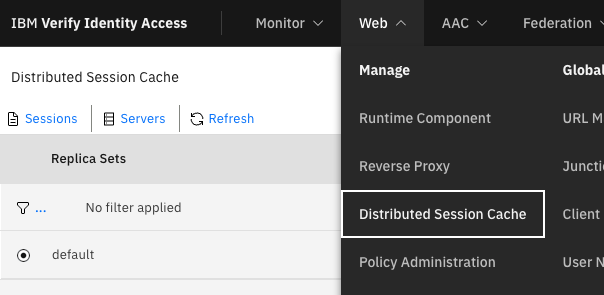
Web > Manage > Distributed Session Cache로 이동
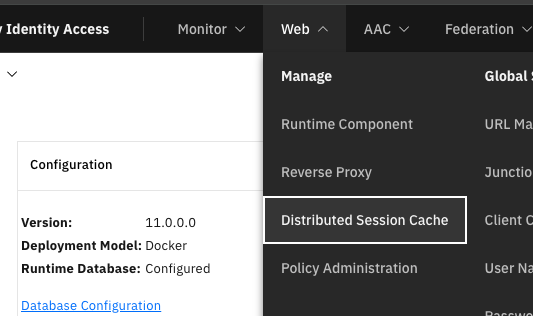
default dsc를 선택하고 위쪽의 Servers 탭을 클릭하면 현재 해당 DSC를 사용하고 있는 reverse proxy리스트를 확인할 수 있습니다.
6.9 Create User & Test DSC
새로운 유저를 만들고 유저의 세션을 관리할 수 있는지 테스트해보겠습니다.
config pod로 들어가서 pdadmin 커맨드를 쳐서 sec_master계정으로 로그인합니다.
$ oc exec -it iviaconfig-6b5b6997c5-59dl2 -- pdadmin
pdadmin> login
Enter User ID: sec_master
Enter Password: Passw0rd
chuck이라는 이름의 유저 생성
pdadmin sec_master> user create chuck uid=chuck,dc=ibm,dc=com Chuck Kelly Passw0rd
pdadmin sec_master> user modify chuck acc yes
유저 리스트 출력
pdadmin sec_master> user list * 100
sec_master
ivmgrd/master
rp1-webseald/iviaconfig-6b5b6997c5-59dl2
emily
chuck
생성한 유저 정보 확인
pdadmin sec_master> user show chuck
Login ID: chuck
LDAP DN: uid=chuck,dc=ibm,dc=com
LDAP CN: Chuck
LDAP SN: Kelly
Description:
Is SecUser: Yes
Is GSO user: No
Account valid: Yes
Password valid: Yes
이제 방금 만든 유저를 가지고 reverse proxy에서 로그인을 시도해보겠습니다.
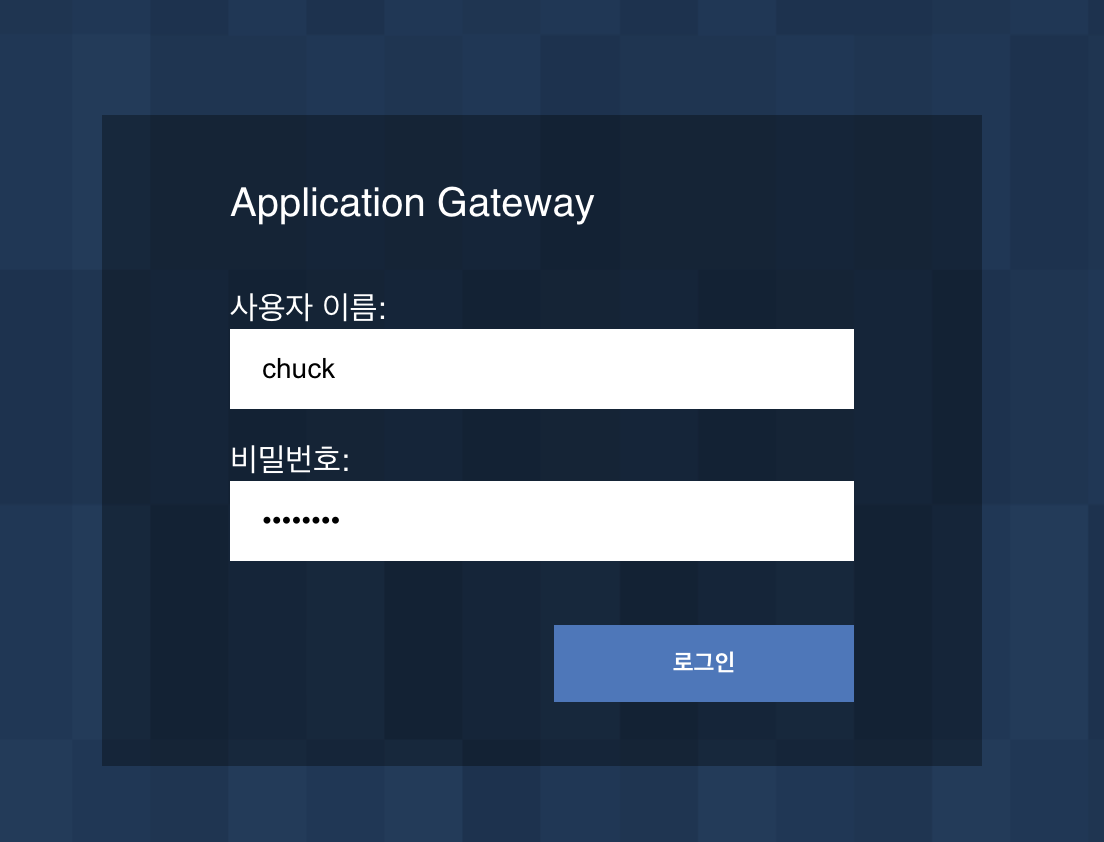
성공!
이제 IVIA콘솔로 이동하여 세션을 확인해보겠습니다.
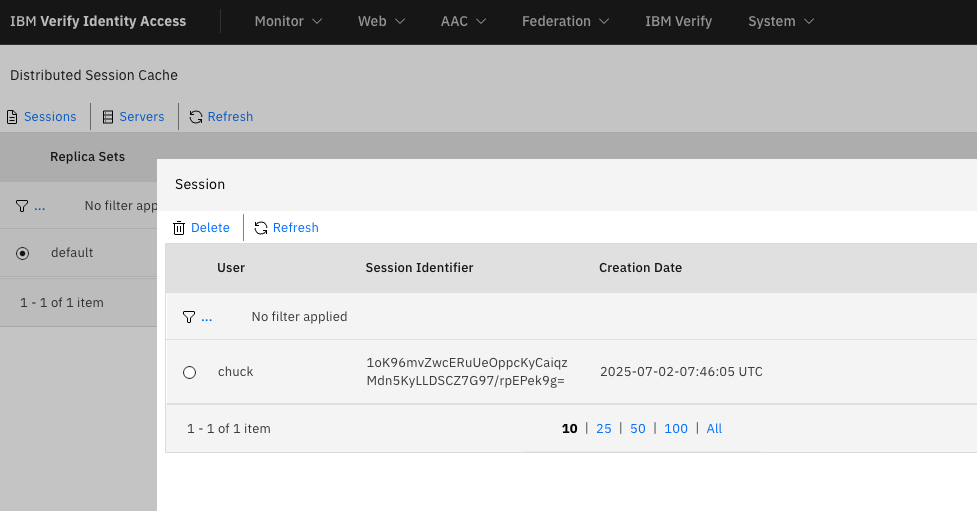
Web > Manage > Distributed Session Cache
dsc선택하고 Sessions탭을 누르면 현재 로그인 한 유저의 세션을 확인할 수 있습니다.
세션을 삭제하면
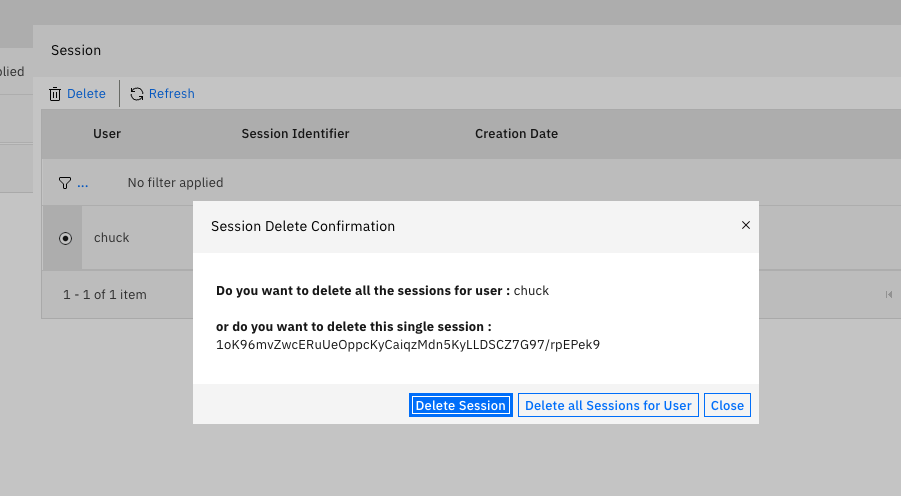
자동으로 로그아웃처리가 됩니다.
댓글남기기